Service Locator
- Angler Endorsement
- Boat Towing Coverage
- Mechanical Breakdown
- Insurance Requirements in Mexico
- Agreed Hull Value
- Actual Cash Value
- Liability Only
- Insurance Payment Options
- Claims Information
- Towing Service Agreement
- Membership Plans
- Boat Show Tickets
- BoatUS Boats For Sale
- Membership Payment Options
- Consumer Affairs
- Boat Documentation Requirements
- Installation Instructions
- Shipping & Handling Information
- Contact Boat Lettering
- End User Agreement
- Frequently Asked Questions
- Vessel Documentation
- BoatUS Foundation
- Government Affairs
- Powercruisers
- Buying & Selling Advice
- Maintenance
- Tow Vehicles
- Make & Create
- Makeovers & Refitting
- Accessories
- Electronics
- Skills, Tips, Tools
- Spring Preparation
- Winterization
- Boaters’ Rights
- Environment & Clean Water
- Boat Safety
- Navigational Hazards
- Personal Safety
- Batteries & Onboard Power
- Motors, Engines, Propulsion
- Books & Movies
- Cockpit Confessions
- Communication & Etiquette
- Contests & Sweepstakes
- Colleges & Tech Schools
- Food, Drink, Entertainment
- New To Boating
- Travel & Destinations
- Watersports
- Anchors & Anchoring
- Boat Handling

Tuning A Sailboat Rig
Advertisement
If your sailboat seems slower, follow our how-to on tuning your rig for optimal performance.

Photo: Bigstock
Spring is a time of prepping your boat for the coming season. While powerboaters fine-tune their engines, sailors should consider fine-tuning their rigs. Doing it yourself may seem intimidating, but it shouldn't be. Anyone reasonably handy can do it in a few hours. The reward is easier and faster sailing throughout the coming season.
Let's start with the basics for new sailors. With a few exceptions, a sailboat mast is held up by a series of stainless-steel wires. But those wires also perform several other equally important functions. When a sailboat is at rest and there is no wind blowing, the stress on these wires is very light with almost all the load downward toward the keel. However, when the boat is sailing and heeled over in a fresh breeze, more stress is placed on the wires and they have to work harder to hold the mast upright and stop it from bending.
The wires that prevent the mast from moving from side to side are called shrouds, and the ones that prevent fore and aft movement are called stays. The larger and taller the mast, the greater the load, and the number of shrouds and stays required. On a typical cruiser, say up to about 35 feet, there will generally be one forestay, one backstay, and two shrouds on each side.
To get the best performance from your boat and sails, the rigging needs to be set up correctly — often called "tuning the rig." The rig should be tuned with the boat in the water on a day with little to no wind. You'll also want to be away from wakes and other boats that can rock your boat. To start, the turnbuckles for the stays and shrouds should be hand-tight only. This is sufficient to hold up the rig but places no strain on anything — yet. Lay on your back on the boat's foredeck and sight up the front of the mast. It should be perfectly straight with no bends or kinks. Next, tighten the lower shrouds — these are the ones that do not go all the way to the top of the mast and often attach to the mast at the base of the crosstrees (the two horizontal spars at the upper ends of the topmasts).
You'll need a large screwdriver to rotate the turnbuckle, and a wrench to hold the shroud fitting and prevent it turning as you tighten. Give a couple of complete turns on either side. Have a helper release the main halyard and keep a little tension while you pull down the end that normally attaches to the mainsail until it just touches the top of the toerail adjacent to the chain plate. Have your helper cleat off the halyard, then swing the halyard over the boom and check the measurement on the other side. They should be the same. If not, adjust the turnbuckles until they the measurement is equal on port and starboard.

Adjusting and tuning a sailboat rig will often bring benefits such as easier handling and better performance.
Next do the same for the cap shrouds, these are the ones that go to the top of the mast, but note that due to the length of the shrouds, it is easy to bend the mast to either port or starboard. With the shrouds adjusted, sight up the mast one more time to ensure that it is still straight.
Next comes the fore and aft adjustment, which is made with the backstay and forestay. Masts should be plumb or lie back slightly. It should never rake forward. A good starting point is to tighten up the forestay and backstay a little over hand-tight. Use the main halyard as a plumb bob. Cleat off the halyard so the free end is just clear of the top of the boom and let it hang. If the shackle on the end of the halyard hits the mast, the mast is likely too far forward, so slacken off the forestay and tighten the backstay. Adjust a little at a time until the end of the halyard hangs free — 4 or 5 inches is a good starting point.
You'll need to install cotter pins into the turnbuckles to prevent them loosening over time, but before doing that, take the boat for a sail when the wind is blowing about 10 knots and see how everything works. With the boat on a beam reach, note the tightness of the windward shrouds. If they appear slack, they will need to be adjusted up. If the boat is hard on the tiller or wheel and tries to turn into wind, the mast has too much aft rake, so you'll want to slacken the backstay and tighten up on the forestay a little. If the bow wants to turn away from the wind, the mast is too far forward, so you'll need to move the mast back a little.
If you are at all unsure about tackling this task, play it safe and smart — seek out the services of a qualified rigger who has access to rig tension gauges and other specialized tools.
Related Articles
The truth about ceramic coatings for boats.
Our editor investigates the marketing claims of consumer-grade ceramic coatings.
Fine-Tune Your Side Scan Fishfinder
Take your side-scanning fishfinder off auto mode, and you’ll be spotting your prey from afar in no time
DIY Boat Foam Decking
Closed-cell foam flooring helps make boating more comfortable. Here’s how to install it on your vessel
Click to explore related articles
Contributing Editor, BoatUS Magazine
A marine surveyor and holder of RYA Yachtmaster Ocean certification, BoatUS Magazine contributing editor Mark Corke is one of our DIY gurus, creating easy-to-follow how-to articles and videos. Mark has built five boats himself (both power and sail), has been an experienced editor at several top boating magazines (including former associate editor of BoatUS Magazine), worked for the BBC, written four DIY books, skippered two round-the-world yachts, and holds the Guinness World Record for the fastest there-and-back crossing of the English Channel — in a kayak! He and his wife have a Grand Banks 32.
BoatUS Magazine Is A Benefit Of BoatUS Membership
Membership Benefits Include:
Subscription to the print version of BoatUS Magazine
4% back on purchases from West Marine stores or online at WestMarine.com
Discounts on fuel, transient slips, repairs and more at over 1,200 businesses
Deals on cruises, charters, car rentals, hotel stays and more…
All for only $25/year!
We use cookies to enhance your visit to our website and to improve your experience. By continuing to use our website, you’re agreeing to our cookie policy.
The Worldwide Leader in Sailmaking
- Sail Care & Repair
- Sailing Gear
- Find A Loft
- Sail Finder
- Custom Sails
- One Design Sails
- Flying Sails
- New Sail Quote
- 3Di Technology
- Helix Technology
- Sail Design
- AEROTECH Spinnaker Cloth
- NPL RENEW Sustainable Sailcloth
- Sailcloth & Material Guide
- Polo Shirts
- Sweaters & Cardigans
- Sweatshirts & Hoodies
- Accessories
- Shop the look
- Mid & Baselayers
- Deckwear & Footwear
- Luggage & Accessories
- Fall Winter '24
- North Sails x 37th America's Cup
- Sailor Jackets
- SALT X North Sails
- NS x Slowear
- T-shirts & Tops
- Sailor Jacket
- Sustainability
- North Sails Blog
- Sail Like A Girl
- 37th America's Cup
- Icon Sailor Jacket
- Our Locations
- Certified B Corporation
- North SUP Boards
- North Foils
- North Kiteboarding
- North Windsurfing
SAIL FINDER
SAILING GEAR
COLLECTIONS & COLLAB
COLLECTIONS
WE ARE NORTH SAILS
ACTION SPORTS
Popular Search Terms
Organic cotton
Scuba fleece
Drawstring hood
Utility pocket
Stand collar
Sorry, no results for ""
Subscription
Welcome aboard.
We want to make our emails as relevant as possible for you.
Interests saved
Something went wrong, please try again
Welcome to North Sails
Stay up to date with the latest North Sails news.
Receive a 10% discount code for your first apparel order. Excludes sails and SUP’s. See our Terms and Conditions .
Yes, I agree to the terms of use and privacy policy.
HOW TO TUNE YOUR RIG
Without a properly tuned rig, you won’t be able to control your mast’s behavior over the full range of conditions. Fortunately, rig tuning is a straightforward step by step process for both masthead and fractional rigs.
The goals in rig tuning are the following: (1) Eliminate side bend and lean, (2) Set mast rake for proper helm balance, (3) Set pre-bend to match the mainsail design, and (4) Control mast bend and headstay sag.
Here are a few definitions and explanations to get us started.
GET IN TOUCH
REQUEST A QUOTE
BROWSE ALL SAILS
FIND YOUR SAIL
Featured stories, offshore sailing guide, how to care for your foul weather gear, npl renew faq.
- Refresh page
- BOAT OF THE YEAR
- Newsletters
- Sailboat Reviews
- Boating Safety
- Sails and Rigging
- Maintenance
- Sailing Totem
- Sailor & Galley
- Living Aboard
- Destinations
- Gear & Electronics
- Charter Resources
- Ultimate Boating Giveaway
How to Inspect and Tune a Sailboat Rig
- By Ralph Naranjo
- Updated: May 14, 2020

Major mast failures usually begin as minor hardware problems. At least that’s what scrap-bin forensics seems to confirm. So, instead of dreading a dismasting, prevent it with a sensible approach to rig maintenance.
Some sailors inspect their masts and rigging with the spar stepped, but most recognize how much will remain unseen. Riggers recommend that the mast come out every few years and be placed on a pair of sturdy sawhorses ready for close-up scrutiny. My DIY approach focuses on hardware junctions and points where load paths intersect. Packed in my rigger’s bag are the usual hand tools, plus a Scotch pad, a quality magnifying glass and a small digital camera to record the findings. The old rule of thumb is that standing rigging has a decade’s, or one circumnavigation’s, worth of reliability; it’s a benchmark that remains valid today.
Another important issue is the rigging’s designed safety factor, or how much stronger the components are than they need be. The catch here is material deterioration over time, and the fact that there’s a direct correlation between stronger structures and increased reliability. For example, by increasing 1-by-19 shrouds and their attendant hardware from 5/16 inch to 3/8 inch, the higher safe working load translates into a longer life span. It’s a legit assumption, but doing so is both costlier and adds weight aloft, which can rob performance. The same tenets apply for a larger-diameter spar section and greater wall thickness. Engineers and naval architects try to balance these competing factors.

Some decades ago, I watched the deck-stepped spar of my first little cruising sloop drop into the drink. It drove home the fact that it really is the little things that count. In that case, it was a stainless- steel toggle, connected to an upper shroud turnbuckle, which had endured a few too many on-off load cycles. A tiny, nearly invisible crack had opened up, and salt spray had found a new home. The resulting corrosion tipped the scale and led to a dramatic failure. Since then, rig scrutiny has become my obsession.
The old rule of thumb is that standing rigging has a decade’s, or one circumnavigation’s, worth of reliability.
Wire and rod end fittings need a close look, especially in areas where there are brown stains and signs of cracks, pitting or other surface deterioration. This includes an evaluation of clevis-pin holes that should be circular, not elongated. Confer the same level of scrutiny to the clevis pins themselves. Don’t confuse stainless-steel clevis pins with chrome-plated bronze pins. The latter are just fine when used in bronze fittings, but when a bronze clevis pin is placed in a stainless-steel chainplate hole, the bronze pin can be carved away by the much harder stainless-steel chainplate.
My inspection process includes a rigging-wire wipe-down with a rag that easily snags on tiny cracks. It includes careful scrutiny of hardware junctions. I search for signs of chafe, especially where fiber or wire running rigging makes directional changes at sheave boxes, and around where the headsail furler’s top swivel rides. Looking closely at masthead exit points, I check for sheave wobble, excess side play and signs of pulley damage.

This is also the time to sort out halyards that are rubbing against external or internal obstructions. I use a bright, narrow-beam LED flashlight for a good visual inspection of the internal portion of the mast. Not only will it pinpoint screws and sheave boxes that might be causing chafe, but it also will help you untangle crossed halyards and confirm fairleads. While working at the heel end of the spar, look closely for corrosion and a condition riggers call “elephant foot.” It’s an actual wrinkling of the alloy tube section caused by too much compression and a too-thin wall section. It’s most often seen on raceboats with powerful hydraulic mast-adjusting systems, and on cruising boats that have pounded into too many steep wave faces.

Roller furling foils hide the wire or rod on which they spin. Rigging end fittings and terminals can usually be inspected, but a broken strand of wire inside the foil might initially go unnoticed, at least for a little while. This is another reason why offshore cruisers opt for a cutter or solent rig that adds a second stay for some extra insurance. Following the once-a-decade rule, it makes sense to completely disassemble furling systems, and replace the wire along with any worn bearings, bushings or plastic spacers.
My inspection process includes a wire wipe-down with a rag that easily snags on tiny cracks. I search for signs of chafe everywhere.
Keep in mind that when the mast is unstepped, many roller furling drums and head foils (especially on boats with deck-stepped rigs) extend beyond the heel of the spar. If the yard doesn’t splint and immobilize the extended foil and drum, do it yourself. All it entails is a couple of 2-by-4’s, or a pair of old oars lashed or duct-taped to the mast just above the heel. This double splint should extend to the base of the roller-furling drum where it too is lashed or taped. It keeps the drum from dangling and bending the foil during transport, and while the rig is stored on a mast rack.

Spreaders also deserve a really close look. All too often, excess anti-chafe protection results in the spreader tips becoming a water trap that turns into a hidden corrosion bath. So, when the rig is down, cut away the spreader-tip padding, and use white vinegar and a plastic scrub pad to get rid of any white powdery oxidation. Remove the spreaders from the spar, and inspect the area where spreader bases make contact with the mast. Look for compression damage to the mast wall and signs of corrosion damage. If all is well, reassemble using one of the tried-and-proven water-resistant lubricants. I’ve settled on Lanocote, McLube Sailkote and Super Lube, using Boeshield T-9 and WD-40 as my go-to spray protectant and penetrant. Throw away the old cotter pins, and use new pins on all of the reassembled rigging.

“She’ll be right, mate,” was the favorite phrase of an old Kiwi friend, but it isn’t good advice when it comes to keeping the rig where it belongs. Don’t shy away from calling in a qualified rigger to handle larger problems.

Most boatyards will restep spars but won’t tune the rig. Their goal is to set up the mast and rigging to approximate how it arrived. Occasionally, they hit the mark and even replace the mast wedges appropriately. Otherwise, I wait for a flat calm to make sure that the boat has no list. This involves using a tape measure to confirm the athwartship trim (waterline to rail-height port equals waterline to rail-height starboard). Then I check the perpendicular and rake of the mast using the main halyard with a makeshift plumb bob (dive weight) attached. The retune requires loosening the turnbuckles and incrementally retensioning the rigging. Small amounts of headstay and backstay adjustment relocates the masthead, causing the makeshift plumb bob to move significantly. I use prior measurements from previous mast-tuning successes to set the rake to a sweet spot that, in the past, delivered a minimal amount of weather helm.

With the rake set, I insert a set of teak or high-density hard-rubber wedges between the mast and the mast partners. These wedge-shaped spacers have a top flange that prevents them from falling into the bilge when the mast compresses on one side of the partners and opens the gap wider on the other. With all the wedges set, I incrementally add tension to the rig, tightening headstay and backstay first, while carefully maintaining the rake angle. Next, I adjust the upper shroud (or V1), working from side to side to keep the mast perpendicular. Finally, I snug up (but not overtension) the lower and intermediate shrouds. This static tuning sets the stage for an underway final tune, during which I check how well the spar remains in column. Leeward bends and S-curves are problematic and must be minimized. Boats with discontinuous rigging have shrouds that are not one continuous wire run. They utilize turnbuckles located above spreaders that must be individually adjusted to eliminate side bend.
During sea trials, make sure the leeward standing rigging is not overly slack and flopping around like loose spaghetti.
Intentional fore and aft mast bending can influence sail shape, and is put to good use aboard raceboats. Adding such complication to most cruising boats, which are normally steered by an autopilot, makes less sense. In-mast furling spars are least happy with powerful hydraulic backstays bowing the mast. So, get sound advice from a rigger/mast builder before adding hydraulic sail-shaping gear.

A sea trial should follow your static mast tune. And as you beat to windward in a modest 10- to 15-knot true breeze, check the leeward standing rigging. Make sure it’s not overly slack and flopping around like loose spaghetti. If so, add more shroud tension to both sides. A tension-testing gauge will work, but many sailors do fine estimating by hand. Cruising-boat rigs shouldn’t have the same amount of rig tension as a raceboat beating to windward. However, if your sailboat’s mast is deck-stepped, make sure the coachroof isn’t deforming due to the compression load. A compression post, ring frame or other rigid structure should be spreading such loads. If you’re unsure of the correct rig tune, arrange a session with a rigger or sailmaker—and start the season in optimized trim.
Technical expert Ralph Naranjo has inspected the rig on his Ericson 41, Wind Shadow , on countless occasions.
- More: fitting out , hardware , How To , mast , rigging
- More How To

Grease the Wheels of Your Boat: A Guide to Proper Lubrication

A Bowsprit Reborn: A DIY Renovation Story

Rigging Redo: Our Switch to Synthetic

Top Tools for Sailboat Cruising: Must-Have Gear for 2024

Galápagos: A Paradise Worth the Paperwork

Around Alone

- Digital Edition
- Customer Service
- Privacy Policy
- Terms of Use
- Email Newsletters
- Cruising World
- Sailing World
- Salt Water Sportsman
- Sport Fishing
- Wakeboarding
How to tune your rig for optimal performance
Optimizing the performance of your boat's rigging system is crucial for an enjoyable and safe sailing experience. This guide provides step-by-step instructions for tuning your rig and maintaining your sails.
How to Tune Your Rig for Optimal Performance
Sailing is an art that requires constant learning and adaptation. One of the most important aspects of sailing is ensuring that your boat’s rigging and sails are in top condition. In this article, we will discuss how to tune your rig for optimal performance, ensuring that you and your family can enjoy smooth sailing on your adventures.
Table of Contents
Understanding the basics of rigging, the importance of rig tuning, step-by-step guide to rig tuning, sail improvements for better performance, maintaining your rig and sails.
Before we dive into the process of rig tuning, it’s essential to understand the basics of rigging. The rigging system on a sailboat consists of various components, including the mast, boom, shrouds, stays, and sails. These components work together to provide stability, support, and propulsion for your boat.
Mast and Boom
The mast is the vertical pole that supports the sails, while the boom is the horizontal pole attached to the mast’s base. The mast and boom are critical components of your rigging system, as they provide the framework for your sails.
Shrouds and Stays
Shrouds and stays are the wires or ropes that connect the mast to the boat’s hull. They provide lateral and fore-and-aft support for the mast, ensuring that it remains stable and upright. Shrouds are typically attached to the sides of the boat, while stays are connected to the bow and stern.
Sails are the primary means of propulsion for a sailboat. They work by capturing the wind’s energy and converting it into forward motion. There are various types of sails, including mainsails, jibs, and spinnakers, each with its own unique characteristics and uses.
Rig tuning is the process of adjusting your boat’s rigging system to achieve optimal performance. Proper rig tuning can significantly impact your boat’s speed, handling, and overall sailing experience. Some of the benefits of rig tuning include:
- Improved boat speed and pointing ability
- Enhanced sail shape and efficiency
- Reduced wear and tear on rigging components
- Increased safety and stability
By regularly tuning your rig, you can ensure that your boat is always performing at its best, allowing you and your family to enjoy your sailing adventures to the fullest.
Rig tuning can be a complex process, but with the right knowledge and tools, it’s something that any sailor can learn to do. Here’s a step-by-step guide to help you tune your rig for optimal performance:
Step 1: Inspect Your Rigging
Before making any adjustments, it’s essential to inspect your rigging for signs of wear, damage, or corrosion. Check all components, including the mast, boom, shrouds, stays, and sails, for any issues that may affect your boat’s performance.
Step 2: Set Your Mast Rake
Mast rake refers to the angle of the mast relative to the boat’s centerline. Adjusting the mast rake can have a significant impact on your boat’s balance and performance. To set your mast rake, follow these steps:
- Attach a weight to your main halyard and let it hang freely over the side of the boat.
- Measure the distance from the halyard to the boat’s centerline at the chainplates.
- Adjust the forestay and backstay until the desired rake is achieved.
Step 3: Adjust Your Shrouds and Stays
Next, you’ll need to adjust your shrouds and stays to ensure proper mast alignment and tension. Follow these steps:
- Loosen all shrouds and stays.
- Tighten the upper shrouds until the mast is straight from side to side.
- Tighten the lower shrouds to remove any side-to-side play in the mast.
- Adjust the forestay and backstay to achieve the desired mast bend.
Step 4: Check Your Rig Tension
Proper rig tension is crucial for maintaining sail shape and boat performance. To check your rig tension, follow these steps:
- Attach a tension gauge to your shrouds and stays.
- Measure the tension in each wire, adjusting as necessary to achieve the desired tension.
- Ensure that the tension is even on both sides of the boat.
Step 5: Fine-Tune Your Rig
Once your rig is properly tensioned and aligned, you can make any final adjustments to optimize performance. This may include adjusting your sail controls, such as the outhaul, cunningham, and vang, to fine-tune sail shape and efficiency.
In addition to rig tuning, there are several sail improvements that you can make to enhance your boat’s performance. Some of these improvements include:
- Upgrading to high-quality sails made from durable, lightweight materials
- Regularly cleaning and inspecting your sails for signs of wear or damage
- Using sail battens to improve sail shape and efficiency
- Installing a roller furling system for easier sail handling and storage
By investing in these sail improvements, you can ensure that your boat is always performing at its best, allowing you to enjoy your sailing adventures to the fullest.
Regular maintenance is essential for keeping your rig and sails in top condition. Some maintenance tasks to consider include:
- Inspecting your rigging for signs of wear, damage, or corrosion
- Lubricating moving parts, such as sheaves and blocks, to reduce friction and wear
- Replacing worn or damaged components, such as shrouds, stays, and sails
- Regularly cleaning your sails to remove dirt, salt, and other contaminants
By staying on top of these maintenance tasks, you can prolong the life of your rig and sails, ensuring that your boat is always ready for your next adventure.
Tuning your rig for optimal performance is an essential skill for any sailor. By following the steps outlined in this article, you can ensure that your boat is always performing at its best, allowing you and your family to enjoy your sailing adventures to the fullest. Remember to regularly inspect and maintain your rig and sails, and don’t be afraid to make improvements and adjustments as needed. With the right knowledge and tools, you can transform your boat into a high-performance sailing machine that’s ready to take on the open sea.

How To Tune Your Sailboat Rig
- August 2, 2023
Table of Contents
Sailing, with its perfect balance of adventure and tranquility, has enchanted mariners for centuries. Whether you’re cruising coastal waters or vying for victory in a thrilling regatta, your sailboat ‘s performance hinges on a seemingly unassuming yet critical aspect: rig tuning. Understanding how to properly adjust the tension in your sailboat’s standing rigging is the key to unlocking the full performance of the boat. In this article, we delve into the art of sailboat rig tuning, exploring the reasons why it is not only important but fundamental to achieving optimal performance, safety, and overall sailing enjoyment.
Why Tuning Your Rig Is Important
Tuning your sailboat rig is essential for several reasons that directly impacts your sailboat’s performance, safety, and overall experience. Here are the main reasons why rig tuning is important:
- Sailing Performance: Properly tuned rigging ensures that the sails are set up optimally for various wind conditions. A well-tuned rig allows the sails to achieve their best shape, providing better lift and speed. It improves the boat’s pointing ability, acceleration, and overall sailing performance.
- Sail Shape and Balance: Rig tuning helps control the shape of the sails, allowing them to perform efficiently. The correct tension in the rigging ensures the right amount of luff tension on the headsail, preventing excessive sag and maintaining proper sail balance. This, in turn, results in better boat balance and easier handling.
- Safety and Durability: An improperly tuned rig can lead to increased stress on the rigging components, mast, and sail. Over-tensioned rigging can cause excessive loads, leading to potential failures or damage. Conversely, under-tensioned rigging can cause the mast to pump or the rig to be unstable in rough conditions. Proper tuning helps prevent rigging issues and increases the overall safety and longevity of the rig.
- Weather Conditions: Different wind conditions require adjustments in rig tension. In light winds, a looser rig allows for a fuller sail shape, while in heavy winds, a tighter rig flattens the sails and depowers the boat. Adjusting the rig to suit the conditions helps maintain control and optimize performance.
- Boat Balance and Helm Feel: Rig tuning affects the boat’s balance and how it responds to the helm. Properly tuned rigging ensures a balanced helm and a boat that tracks well, making it easier to steer and reducing fatigue for the crew.
Regularly checking and adjusting the rig ensures that your sailboat operates at its best, whether you’re cruising or racing. If you’re unsure about rig tuning, consider seeking advice from a professional rigger or an experienced sailor to help you get the most out of your boat.

Sailboat Rig Tuning Process
Tuning a sailboat rig involves adjusting the tension in the standing rigging (shrouds and stays) to achieve the correct balance and shape of the mast and sails. Here’s a step-by-step guide to help you tune your sailboat rig:
1. Check the Basics:
- Ensure the boat is level and upright, preferably in the water, with the mast straight.
- Check that all turnbuckles are free and not corroded or stuck.
2. Determine the Baseline:
- Refer to your sailboat manufacturer’s manual, sailmaker ‘s tuning guide, or rigging expert’s recommendations for the initial baseline settings of your rigging tension. This usually includes the recommended tension for the upper and lower shrouds and forestay/backstay.
3. Loosen the Rig:
- Loosen all the rigging turnbuckles to the point where they are free to move. This step allows you to start with a clean slate and avoids putting undue strain on the rigging while adjusting.
4. Center the Mast:
- Use a measuring tape or a specific mast rake measurement tool to ensure the mast is centered and straight on the boat, both athwartships (side-to-side) and fore and aft.

Closed Reel Long Tape Measure – Flexible Fiberglass Double Face Printing Inch/Metric
5. Adjust Shroud Tension:
- Begin by tensioning the lower shrouds to the recommended baseline tension. Use a tension gauge, Loos gauge, or tensiometer to achieve the desired tension. Repeat this process for both sides of the boat.
- Next, adjust the tension in the upper shrouds to match the recommended baseline tension. Be careful not to overtighten any of the rigging.

Spinlock Rig Sense Tension Gauge for 2-5mm Wire

Sailboat Rigging Tension Gauge from Loos & Co., PT-2 Professional Hands-Free Force Gauge Up To 2,000 lb

Sailboat Rigging Tension Gauge from Loos & Co., PT-3 Professional Hands-Free Force Gauge Up To 4,500 lb
6. Check Mast Bend:
- Securely, attach the main halyard to the lowest point on the rear base of the mast. From there, tighten the main halyard until there is a fair amount of tension on it. The main halyard represents a straight line which is the base line for your measurement. If there is mast bend present, there will be a gap between the main halyard and middle of the mast at its furthest bend point. This gap is what is to be measured for your mast bend measurement.
7. Check Mast Rake:
- Mast rake refers to the fore and aft angle of the mast. It can impact boat balance and helm feel. Use a mast rake measurement tool or reference marks on the boat to adjust the mast rake as needed, following the manufacturer’s recommendations or your sailmaker’s advice.
8. Check Forestay Tension:
- Adjust the forestay tension to achieve the desired amount of luff tension on the headsail. For sailboats with adjustable backstays, make sure your backstay off off when taking this measurement. For boats with a fixed backstay, a proper forestay tension ensures proper sail shape and minimizes sag in the forestay.
9. Tune the Backstay:
- If your boat has an adjustable backstay, adjust it to control the bend in the mast and headsail shape. More tension on the backstay usually flattens the mainsail and depowers the rig, while less tension allows for a fuller sail shape.
10. Fine-Tuning:
- Go sailing and make small adjustments to the rig while underway to achieve the best sail shape and performance. Pay attention to how the boat behaves in different wind conditions and adjust the rig accordingly.
11. Periodic Checks
- Rig tuning is not a one-time task. Check your rig regularly for any changes due to sailing conditions, mast compression, or wear. Make adjustments as needed to maintain optimal performance.
It’s essential to keep a record of your rigging settings and changes so you can refer back to them and fine-tune your rigging over time. If you’re unsure about tuning your rig, consider seeking advice from a professional rigger or experienced sailor.

The Sailor’s Marketplace for Sailboats and Sails.
Sell Your Sailboat
Sailboats for sale.
- New Sailboats
- Used Sailboats
- Cruising Sailboats
- Racing Sailboats
Sell Your Sails
Sails for sail, sail manufacturers.
- North Sails
- Quantum Sails
- Doyle Sails
- UK Sailmakers
Sailing Reviews
- Sailing Line
- Safety Equipment
- Sailing Accesories
As an Amazon Associate SailTrader earns from qualifying purchases.
This website uses cookies to ensure you get the best experience possible.
- New Sailboats
- Sailboats 21-30ft
- Sailboats 31-35ft
- Sailboats 36-40ft
- Sailboats Over 40ft
- Sailboats Under 21feet
- used_sailboats
- Apps and Computer Programs
- Communications
- Fishfinders
- Handheld Electronics
- Plotters MFDS Rradar
- Wind, Speed & Depth Instruments
- Anchoring Mooring
- Running Rigging
- Sails Canvas
- Standing Rigging
- Diesel Engines
- Off Grid Energy
- Cleaning Waxing
- DIY Projects
- Repair, Tools & Materials
- Spare Parts
- Tools & Gadgets
- Cabin Comfort
- Ventilation
- Footwear Apparel
- Foul Weather Gear
- Mailport & PS Advisor
- Inside Practical Sailor Blog
- Activate My Web Access
- Reset Password
- Customer Service

- Free Newsletter
Catalina 270 vs. The Beneteau First 265 Used Boat Match-Up

Ericson 41 Used Boat Review

Mason 33 Used Boat Review

Beneteau 311, Catalina 310 and Hunter 326 Used Boat Comparison

Tips From A First “Sail” on the ICW

Tillerpilot Tips and Safety Cautions

Best Crimpers and Strippers for Fixing Marine Electrical Connectors

Thinking Through a Solar Power Installation

Polyester vs. Nylon Rode

Getting the Most Out of Older Sails

How (Not) to Tie Your Boat to a Dock

Stopping Mainsheet Twist
Fuel Lift Pump: Easy DIY Diesel Fuel System Diagnostic and Repair

Ensuring Safe Shorepower

Sinking? Check Your Stuffing Box

The Rain Catcher’s Guide

What Do You Do With Old Fiberglass Boats?

Boat Repairs for the Technically Illiterate

Boat Maintenance for the Technically Illiterate: Part 1

Whats the Best Way to Restore Clear Plastic Windows?

Giving Bugs the Big Goodbye

Galley Gadgets for the Cruising Sailor

Those Extras you Don’t Need But Love to Have

What’s the Best Sunscreen?

UV Clothing: Is It Worth the Hype?

Preparing Yourself for Solo Sailing

How to Select Crew for a Passage or Delivery

R. Tucker Thompson Tall Ship Youth Voyage

On Watch: This 60-Year-Old Hinckley Pilot 35 is Also a Working…

On Watch: America’s Cup

On Watch: All Eyes on Europe Sail Racing

Dear Readers
- Sails, Rigging & Deck Gear
Boat Clinic: Tuning the Masthead Rig
My father was a rarity: he really did not care at all how well the boats he sailed performed. Perhaps this was because, in his youth and young manhood, he had been both a tremendously aggressive and a wonderfully successful athlete and thus had wrung out his competitive needs.
Tuning the rig of a boat is one of the necessary -and pleasant -tasks which must be done to achieve good performance. In an untuned boat, the mast bends in odd ways, and this in turn causes the sails to set badly. By contrast, on a well tuned boat , the rig bends in a controlled fashion, allowing the sails to do their best. For this reason, an avid racer will be constantly fiddling with the tune of his boat, while for most of us a one time job during commissioning may suffice.
The first thing to realize is that for a mast to stand well, it should not be straight when in a static, no load situation. This was something I realized nearly thirty years ago when conventional advice was to tune rigs so that masts were indeed straight when static, and while that advice is still sometimes given, most of the sailing world has realized that a controlled static bend is needed.
The problem with a statically straight mast is that when loaded, it is too easy for the mast to invert, or bend backwards. This can happen when the boat is beating in a seaway or reaching with the spinnaker pole up. Most mast sections can accommodate a significant amount of forward bend without failure, but very little aft bend.
An afternoon spent on a poorly tuned boat a couple of seasons ago left me a nervous wreck. Each time the boat came off a wave the mast pumped and wriggled so much that you could see it changing shape from the tiller. The owner, happy man, was ignorant and oblivious to the danger of losing his rig.
In contrast, if you set up the rig so that it has “prebend”, that is, the center of the mast bends forward when in a static condition, the loaded mast will flex in the proper direction. What flex there is will then tend to flatten the main, rather than bagging it, and the boat should balance better, particularly in heavy air, when most boats start to develop helm problems.
The first job is to get the mast straight athwartships. Leave the lower shrouds hand slack during this procedure. Use the main halyard as a measurer. Take the shackle end of the halyard a measured distance aft of the bow along the gunwale, then have someone take up the slack while you hold the shackle firmly to that point. Cleat off the halyard.
Then take the end of the halyard to the same point on the other side of the boat. If the mast is straight athwartships, the halyard shackle will just kiss the same point on the gunwale on either side of the boat.
Because chainplates are rarely put on perfectly symmetrically on the two sides of the boat, it is best to go to the trouble to measure back from the stemhead on each side for your reference mark, rather than using the chainplates as the reference.
If the halyard doesn’t touch the same point on both sides of the boat, adjust the cap shrouds (upper shrouds) until the mast is straight. Be sure to loosen one side as you tighten the other, and sight up the mast to make sure that you haven’t put any sideways bend in. The sailtrack should be straight athwartships when you sight up the mast, unless it has been put on crooked.
It should be noted that if your deck is slightly crooked -a fairly common problem the mast may not be perfectly centered athwartships in the partners when it is vertical to the hull.
Don’t attempt to make the mast vertical by putting a level on the side of the mast. Almost no boat floats without a list to one side or the other, and your weight alone is enough to put a slight list on a surprisingly large boat.
At this point, on boats up to about 35’, the cap shroud turnbuckles should be hand tight. What’s hand tight? Just what it says: as tight as you can get a well-lubricated turnbuckle with your bare hands. Later, when testing under sail, you’ll find the leeward shrouds slopping around by a few inches; then, and only then, you can take the slack out of the leeward shrouds. If you have absolutely no slack in the leeward capshroud when the boat is going upwind in 1.2 knots of wind, the shrouds are probably too tight for most boats.
Next set the rake of the mast using the fore and back stays, again only hand tight. If you don’t know from experience what the proper rake should be, begin with a modest rake of no more than the fore and aft diameter of the mast. Use the main halyard as a plumb bob. Later you may wish to modify this rake. Utilize the facts that increasing mast rake and/or moving the mast aft increase weather helm,-while decreasing mast rake and/or moving the mast forward decrease weather helm.
Now that the mast is properly straight athwartships and properly raked, it’s time to start the controlled bends. These are accomplished with the forward lowers, babystay, backstay, and mast wedges. Whether your boat has double forward lowers or a single, centerline babystay doesn’t matter. Both systems accomplish the same end.
First, take up the babystay or double forwards until you’ve pulled a forward bend of 1/2” to 1” into the middle section of the mast. Again use the main halyard -this time pulled tight against the lower, aft edge of the mast -as a measuring reference. If using double lowers, make sure the mast remains straight athwartships.
Next crank up on the backstay until you’ve got a curve in the mast equal to 1/2 to 1 times the fore and aft dimensions of the mast. Finally, take up the aft lowers hand tight.
If your mast is stepped on the keel you need at this point to wedge it at the partners. Wooden wedges are easiest to make, but they can dent an aluminum mast if the shrouds are set so loosely that the mast leans to leeward significantly when sailing upwind. A fairly firm rubber wedge works better with looser rigs, and is probably the safest to use. Rubber wedges are usually harder to make, however.
Your boatyard or chandlery may sell special rubber for mast wedges. If not, try to buy something in the nature of thick inner tubing. In a real pinch, sections cut from old auto tires will do, but will have to be rasped to thickness. Don’t use a foam material; it’s too soft. You’ll need two wedges, one fore, one aft. The width of each should be about 35 % to 40% of the mast’s circumference. Thus, they’ll curve around both the front and sides of the mast. Since the rubber wedges must be under compression, their thickness should be slightly greater than the gap they need to fill. You may have to cement together several layers of thin rubber to achieve the proper thicknesses.
The first step in wedging is to trim the wedges so they do not push the mast out of column sideways. As noted earlier, many decks are slightly off center, so there may not be equal space on both sides of the mast, even when it is in the proper position.
When the wedges are properly trimmed for the sides of the partners, you are ready to insert the aft wedge. To support the prebend, put a line around the mast a foot or so above the partners, and run it forward to a fixed point -a snatch block on a mooring cleat or a bridle between the cleats -then aft to a cockpit winch. Now slip the aft wedge into place. Release the load on the line, and insert the forward wedge. A little soap on the wedge will ease a tight fit.
Now you’re ready for a sailing trial.
Choose a day when you can comfortably carry a genoa. About eight to 1 5 knots of wind will do for most boats.
Put the boat hard and full on the wind and check the mast. It should be retaining the same fore and aft curve you put in while tuning. If not, adjust the babystay or forward lower shrouds. Next check the athwartships shape of the mast. It should be straight. Any necessary adjustments should be carried out with the leeward shrouds, then the boat should be tacked to check the effect of the adjustments.
If the mast is straight athwartships, tack and hand tighten all the leeward shrouds by an equal number of turns. If the center of the mast bends to weather, tighten the capshrouds more than the lowers. If the center of the mast sags to leeward, tighten the lower shrouds more than the cap-shrouds.
You should also check the athwart-ships bend of the mast in varying wind strengths, adjusting the aft lowers until you’ve achieved the best compromise between a straight mast and one which falls off or hooks. A masthead which hooks to windward should be avoided.
When, after a few sailing trials, you’re satisfied, pin the turnbuckles, then tape everything that could catch a sail or sheet.
We’ve dealt with what might be called traditionally rigged masts, those with spreaders which sprout essentially at right angles to the mast. Nothing we’ve said, however, isn’t also true of fractional rigs with aft raked spreaders. The only difference is that on such a rig the cap shrouds, as they load up, work on the spreaders to increase forward mast bend, but that’s all to the better.
– J. Pazereskis
RELATED ARTICLES MORE FROM AUTHOR

Working with High-Tech Ropes

Getting a Clue for the Blown-Out Clew
Leave a reply cancel reply.
Log in to leave a comment
Latest Videos

Hans Christian 41T – Boat Review

Seven dead after superyacht sinks off Sicily. Was the crew at...

What’s the Best Sailboats for Beginners?

Why Does A Sailboat Keel Fall Off?
Latest sailboat review.

- Privacy Policy
- Do Not Sell My Personal Information
- Online Account Activation
- Privacy Manager
What You Need to Know About Rig Tune & Performance
March 18, 2022 Updated August 8, 2024
For many sailors, the relationship between rig tune and performance often seems like a black hole. Quantum’s Dave Flynn takes us on a tour of the core elements of the rig and what you need to know to demystify tuning for optimum performance.

Mastering rig tuning for optimal sail trim and performance might seem daunting, but fortunately it’s not as complicated as tuning a Stradivarius violin! To keep it in perspective, remember you are just pulling on a hunk of aluminum or carbon with cables. To master the rig, there are four elements you need to understand: rake, athwartship tuning, mast bend, and headstay sag. Each of the four elements of rig tune either adds power or takes it away. If you understand the basic mechanics of each element, you can tune your rig to improve trim and overall setup.
Mast rake is a measure of how far the mast is angled aft from a straight vertical. A typical mast rake ranges from one to one-and-a-half degrees on a cruising masthead rig to as much as four degrees on a fractional racing rig. A mast should never be raked forward unless there is something unusual in the boat design (you’ll know if this is the case!). When you add rake to the mast, you tilt the whole sail plan aft. This, in turn, shifts the power aft, pushing more load on the stern and forcing the bow up into the wind, creating weather helm.
Rake is determined by headstay length: The longer the headstay, the greater the rake. To adjust your rake, adjust the length of the headstay. How much rake a boat needs to generate the right amount of weather helm is a function of hydrodynamics (hull form, keel shape, and placement). In most one-design racing classes, where lots of time is invested in figuring out what works best, tuning guides specify headstay lengths for conditions. In more developed classes, this will change as a function of wind speed. You’ll want more rake in light air when it is hard to generate helm and less as the breeze builds. For boat setup and trim, adding rake is a tool for generating power in light air, and reducing rake is part of the de-powering process in heavy air.
For cruisers and many non-one-design rigs, you likely don’t have a tuning guide to work from, so to optimize upwind performance you need some helm loading in light-to-moderate conditions. Three to five degrees of rudder angle in 8kts-10kts of wind is a commonly cited target. To test if this angle works for you, sail upwind in 8kts-10kts and let the helm go; the boat should turn gently into the wind. If it goes straight or bears off, you need more rake and vice versa if it spins out of control. Don’t try this test when it is windy; your boat will round up and exhibit too much helm due to heel not rake, and you’ll get a false read.
ATHWARTSHIP TUNING
If the rig is not centered, performance and trim will be different tack to tack. To remedy this, center the top of the rig. Using the diagonal shrouds, bring each successive panel in line with the top. The amount of tension you need is tough to predict at the dock–the mast really needs to be under load. Test tension by sailing upwind in 10kts-12kts of breeze with appropriate trim settings and then check the mast. Is it straight when you put your eye to the aft face and look up the mainsail track? If the tip is falling off, you need more upper tension. If the leeward upper shrouds are flopping around, you need more tension for a given velocity. The shrouds should be firm.
Work on the diagonals next. How much tension you need in the leeward diagonals is determined by how stiff the mast is. In over 10 kts, you definitely want the mast to be straight. For more power in light air, you can let the middle of the mast sag an inch or two to leeward to increase the depth in the mainsail. It is common in one-design classes to ease tension on the diagonals in light air to create this smooth sag.
Dinghies and small keelboats are great boats to experiment with how tuning inputs affect your sail plan. The smaller diameter wire shrouds and relatively small masts dramatically show the impact of tuning adjustments. This isn’t as visible on larger racing or cruising boats with rod rigging. Cruisers will want to set a good base athwartship tune as well. If the rig is uneven side-to-side, you will experience frustrating differences in point and power on each tack. Skip the headache and set a good base tune early in the season. Whatever the condition you are sailing in, once you have established good upwind trim, have a look up the mast to make sure it is in column or sagging slightly to leeward in the middle in light air.
If you have an older cruising boat with a mast stiffness that resembles that of a telephone pole, you can skip this section! But for cruisers with a relatively modern rig, swept-back spreaders, traditional sails with flaking system, or even in-boom or in-mast furling, pay attention here.
While rake is the amount the mast is angled aft, mast bend is the amount you bend the mast aft after you have set your rake. A rig that bends gives you a powerful tool for changing the shape of the mainsail: More mast bend flattens the sail and de-powers it; a straighter mast creates shape and power. Rig tune affects how much a mast bends, particularly on modern fractional rig boats with swept back spreaders. But no matter what type of rig you have, you want to start with a little mast bend, or pre-bend, which refers to the amount of bend that has no backstay tension. Lengthening the headstay increases the bending moment and adds pre-bend. This is why it’s important to set the rake first. Other factors affecting the pre-bend are the position of the mast step and the blocking of the mast in the partner, which is the hole where the mast goes through the deck. To add pre-bend, either move the mast step aft or move the mast forward in the partners. A target of 1”-3” of pre-bend is typical on a medium-sized boat. Pre-bend ensures the mast will move forward in the middle and flatten the mainsail when you pull on the backstay.
On a rig with in-line spreaders (typically masthead rigs), the side shrouds have little impact on the mast bend created by pulling on the backstay. On some rigs, however, there are check stays to keep the mast from bending too far. Sometimes there are even multiple sets.
How far is too far when bending the mast? You’ll know when your mainsail develops diagonal wrinkles from the clew up to the luff and is beginning to turn inside out. For maximum de-powering, bend just to the point where wrinkles appear. If available, use check stays to help.
On modern fractional rigs with spreaders swept well aft, the side shrouds have a big impact on mast bend. The diagonal shrouds are controlling not only athwartship tuning but also acting like check stays to inhibit mast bend, since they are swept back and pulling aft. Too tight, and the diagonal shrouds will keep the mast from bending and flattening the mainsail; too loose, and the mast can over-bend and turn the sail inside out. In many classes, overall rig tension is increased by taking turns on the shrouds, shortening the headstay, or pumping the whole rig up with a mast jack for more backstay tension without allowing the rig to over-bend as it gets windier.
HEADSTAY SAG
If some mast bend is good, why isn’t more better? The answer is headstay sag. When the headstay sags, the headsail becomes full and more powerful, which is great in light conditions. But as the breeze builds, you want to reduce the amount of sag as much as possible to de-power the boat and help with pointing. In breeze, it’s all about headstay tension–you can’t get too much. So why is mast bend a factor? When you pull back on the rig with the backstay, it will tighten the headstay, which is good. But you are also pulling down and compressing the rig, which makes it bend. You want some mast bend in order to flatten the mainsail, but not so much that you soften the whole rig and increase headstay sag. This is why we use check stays to control mast bend on a masthead rig and tighter diagonal tension on a swept aft spreader rig.
Rig tune still matters even when you aren’t routinely adding turns to your shrouds based on the wind and conditions. Many modern cruising sailboats with in-mast furling rigs have comparatively smaller tune adjustments, as the rig needs to stay in column for the mainsail to furl properly. Some boats are outfitted with a cascading backstay adjuster that allows for minor tweaks and lets you easily reset the rig when it’s time to furl the mainsail. To get the most performance from your cruising setup, don’t overlook rig tune. Racing sailboats often have their rigs removed for transport and then re-rigged, whereas many cruising boats may never have had the rig adjusted since the boat was first commissioned. If you can't remember the last time your rig was tuned, now is a great time to give your local loft a call.
Having a properly tuned rig is essential to boat setup and performance. While this can be a DIY process, if you have questions or need additional input, please contact a professional rigger or your local loft where our expert Quantum team can help sort out your rig and tune. For one-design tuning guides and resources, select your OD class on the Quantum website or get in touch with a Quantum Class Expert.
Get in touch with David Flynn with additional questions and dive deeper into rig tune for performance. E: [email protected] P: 410-268-1161 ext. 206
The Discussion
This website uses cookies and collects usage statistics. Privacy Policy
Us, too. We pour that passion into each of our newsletters to help you enjoy sailing even more.
- Inshore Fishing
- Offshore Fishing
- Download ALL AT SEA
- Subscribe to All At Sea
- Advertising – All At Sea – Caribbean
Sail Rig Tuning – A Quick How To

You know you want it...
Mocka Jumbies and Rum...

Last month we started looking at sailboat rigging ( Sail Rig Inspection – A Quick How To ), namely how to inspect it to ensure that you enjoy your days on the water worry-free. Once sure that the rig is sound, you can focus on making it perform, and that’s where we pick up this month – sail rig tuning.
A Quick How To on Sail Rig Tuning
A complete sail rig tune involves a static tune at the dock AND a dynamic tune under sail.
How to do the Static Sail Rig Tuning
The static tune ensures everything is straight and true, while the dynamic sail rig tune sets it all up while the boat is under load.
TIP: Always grease and mark turnbuckle threads before adjusting them (to lubricate and establish a starting point).
At the dock, de-tune the athwartships shrouds – slacken upper shrouds more than the lowers. If the yacht has a backstay adjuster, ease it off completely.
Ensure that the mast is standing true by running a metal measuring tape up the sail track with a spare sail slide – from the masthead, measure down to the port and starboard chainplates. If the measurements aren’t equal, carefully adjust the upper shrouds to tilt the mast to port or starboard.
By hand, take up the shrouds symmetrically, uppers first. Sight up the mast track after each adjustment to ensure the mast remains ‘in column,’ without any bends. It’s amazing how accurate your eyes are in this case – trust them. A bend to port at the spreaders, for example, requires more tension on the starboard lower shroud, less on the port.
With large wrenches, carefully tighten the turnbuckles (again, symmetrically, uppers first) to the working shroud tensions. Uppers should be tightest – lowers and intermediates slightly less so. Always use the same arm when checking tension – touch is sensitive enough to notice an unbalance. An over-tensioned rig can indeed bend a fiberglass hull, so be conservative.
How to do the Dynamic Sail Rig Tuning
For the dynamic tune, sail close-hauled in a moderate breeze (12-18 kts). The leeward shrouds should be loose but not slack. Snug them up by hand (count your turns), then tack and do the same on the other side. The mast should remain in column throughout – new bends are best resolved back at the dock.
TIP: Backstay tension determines headstay tension – the jib luff should not have more than 12-18 inches of ‘deflection’ off centerline (most furlers will not furl smoothly if there is any more).
Secure each turnbuckle with new cotter pins, and re-check the rig each time you sail.
Don't Miss a Beat!
Stay in the loop with the Caribbean
LEAVE A REPLY Cancel reply
Save my name, email, and website in this browser for the next time I comment.
Notify me of follow-up comments by email.
Notify me of new posts by email.
This site uses Akismet to reduce spam. Learn how your comment data is processed .

Antiguan Sailor Scores McIntyre Ocean Globe Race Win as Crew of Maiden UK
Usa’s montagu wins 31st international optimist regatta – st. thomas, us virgin islands, puerto rico’s mariner sailboat fleet gains popularity along south coast, so caribbean you can almost taste the rum....

Recent Posts
Bilge pump, period, caribbean coral reefs can recover better with rhythm, exciting new developments underway at camper & nicholsons’ port louis marina in grenada, recent comments, subscribe to all at sea.
Don't worry... We ain't getting hitched...
EDITOR PICKS
Talkative posts, the seven words you can’t put in a boat name, saying “no”, program for financing older boats – tips and suggestions, popular category.
- Cruise 1735
- St. Thomas, US Virgin Islands 497
- Caribbean 430
- Tortola, British Virgin Islands 423

All At Sea - The Caribbean's Waterfront Community Caribbean Cruising, Sailing, Boating, Fishing and Yachting
Contact us: [email protected]
© Kennan Holdings LLC - All Rights Reserved
Practical Boat Owner
- Digital edition

How to set up your rig: tension your shrouds on masthead or fractional
- David Harding
- March 15, 2021
How to set up three common types of rig: the traditional masthead with a single set of in-line spreaders, single-spreader swept fractional rigs, and fractional rigs with two sets of swept spreaders. David Harding reports

How to set up your rig : tension your shrouds on masthead or fractional
If boats were cars, many of those I see sailing along would be coughing and spluttering down the motorway at 35mph in third gear with three flat tyres and a smoky exhaust. Others would cruise past in top gear at 70, making half the noise and using a fraction of the fuel.
Would these top-gear drivers be working any harder? Would they have cars that were faster by design and more expensive? Not at all. They would simply be the ones who had pumped up their tyres, learned their way around the gearbox and had their engines serviced.

It’s worth keeping an eye on your leeward cap shrouds during early-season outings after the mast has been re-stepped. The ones on this yacht could do with a little more tension
The obvious question, then, is why so many boat owners seem to leave their quest for efficiency and economy on the dockside.
One answer is that many are unaware how inefficiently their boats are performing. Another is that there’s no MOT for sailing boats and no driving test to make sure people know how to sail them (thank goodness on both counts).
Whatever the reasons, the fact remains that an efficient rig is fundamental. If the rig’s not right, the sails have no hope of setting properly.
And that’s important whether you’re racing or cruising, because sailors of both persuasions ultimately want the same: maximum lift for minimum drag.
For racers, that means more speed and better results. They carry more sail because they have more crew to handle it and more weight on the rail to balance it.
Cruisers carry less sail but, if it works efficiently, it means less heel, less leeway, better pointing, less tacking, a lighter helm and greater comfort than if it’s working inefficiently – plus the ability to get home before night falls or the pub shuts. Who can object to that?
What matters is that the sail you’re carrying is driving you forwards, not pushing you sideways.
When I question cruising sailors about the state of their rig I often get the reply ‘Oh it doesn’t matter – I’m not racing!’.
Those I know who have done something about it, however, have been delighted by the transformation their boats have undergone and have had to agree that cruising fast and comfortably is definitely better.
Setting up your boat rigging
In this article we’re going to look at how to set up the three most common types of rig: the traditional masthead with a single set of in-line spreaders, single-spreader swept fractional rigs, and fractional rigs with two sets of swept spreaders.
For simplicity we’re assuming the use of 1×19 rigging except where mentioned otherwise.
Variations in boat rig type are almost infinite by the time you take into account deck-stepped and keel-stepped masts, masthead rigs with swept spreaders, jumper struts, fractional rigs with in-line spreaders, and so on.
Once you understand the basics, however, you’ll find that you can apply your knowledge to good effect on most types of rig.
Rig tuning is not only for the experts. Experience helps, of course, and a multiple-spreader fractional rig is harder to tune than an old tree-trunk of a masthead rig from the 1970s.
Nonetheless, with practice, a good eye and some observation you will probably find you can set it up pretty well.
You might want to call in a rigger or an experienced rig-tweaker to help or to do it for you the first time, and perhaps to check it periodically thereafter, but at least if you know what to look for you’ll notice when anything needs adjusting.
A word of warning when it comes to boatyards that have re-stepped your mast: sometimes re-stepping means just that and no more.
I have been on boats whose owners have assumed that the yard had set up the rig, whereas in fact it had just been dropped in and the bottlescrews hand-tensioned to stop it falling over.
It’s scary to think of the number of boats that must have been sailed in this condition.
What you will need to tune your rig Essential A calm day: don’t try setting up your rig in more than a few knots of wind A boat that’s floating level fore-and-aft (and preferably laterally as well) Screwdriver/lever bar Spanners (fixed or adjustable) Needle-nose pliers for split-pins Electrical insulation or self-amalgamating tape Lubricant for bottlescrews Tape measure (folding/small cassette type, or ideally folding rule) Useful Spring balance Long tape-measure Rig-tension gauge
The importance of enough tension: Why tight is right
If you think you’re being kind to your boat by leaving the rigging slack, think again. It’s true that some keelboats (such as Squibs and XODs) sail with the leeward cap shroud waving around in the wind, but that doesn’t work on yachts designed to go to sea.
Rigging that’s under-tensioned puts infinitely more load on the wire, bottlescrews, terminals and hull structure because of the snatch loads every time the boat falls off a wave. When it hits the bottom of the trough, anything that’s free to move gets thrown forwards and sideways before being brought up short by whatever happens to be in the way to stop it. That applies to the crew, to loose gear down below or to the mast. Think of the inertia to which a mast is subjected because of its height, and you can imagine the loads involved.
If the rigging is sensibly tight, on the other hand, movement and the consequent stresses are minimised.
Boats are built to withstand the static loads of a properly-tensioned rig, but asking them to cope with constant snatch loading is unfair – so don’t kill your boat with kindness.
As we discuss in the sections on the types of rig (below), masthead configurations with in-line spreaders need less cap-shroud tension than swept-spreader fractional rigs. This is because in-line caps are only supporting the mast laterally. The backstay stops it moving forwards, so each wire has a separate, clearly-defined role.
Aft-swept caps support the mast both laterally and fore-and-aft. Being swept aft typically about 25°, they need to be under a lot of tension to keep the forestay tight. Because they’re also at a much shallower angle to the mast, they bear between three and five times the load of the forestay.
With fractional rigs, then, it’s vital to keep the cap shrouds tight. If they’re too loose, the forestay will sag too much, the headsail will become too full and its leech will be too tight. Then the boat will become unbalanced, heel too far, make more leeway and lose both speed and pointing ability.
Structurally, under-tensioned rigging with a swept-spreader rig presents a problem in addition to the issue of snatch loading. Tension in the leeward cap shroud is important in keeping the mast in column, to the extent that Loos and Co (the manufacturer of the popular rig-tension gauges) states that a mast loses 50% of its lateral stiffness when the leeward cap goes slack. When this happens, the mast is effectively hinging around the forestay and the windward cap shroud and is far more prone to pumping as the boat bounces around.
The main reason why under-tensioned rigs on cruising boats stay standing as they do is that manufacturers build in enormous margins.
Even so, proper tension means better performance and greater safety. The ‘it doesn’t matter – I’m only cruising’ excuse for slack rigging just doesn’t cut it!
How to measure rig tension

This Loos gauge (left image) is indicating that the 6mm wire in the cap shroud is at 22% of its breaking strain (730kg). To measure the stretch, extend a tape measure (right) (or ideally a folding rule) to 2,000mm and mark this distance up the wire…
…but start with the end of the tape a couple of millimetres above the top of the swaging. As the wire is tensioned it will stretch, increasing the gap below the end of the tape.
Experienced riggers and rig-tweakers will often tension the rigging at the dockside by feel, then sight up the mast and make any adjustments under way.
Most people aren’t confident enough to do this, though – so what are the best ways to check the tension as you wind down the bottlescrews?
The simplest and quickest way is to use a rig-tension meter, such as the Loos gauge. Once you know the diameter of the wire, it will give you the load both in kg and as a percentage of its breaking strain.
The gauge for rigging of 5m and 6mm (and up to 14% of breaking strain on 7mm) typically costs around £65, while the bigger version for wire from 7mm to 10mm is closer to £200.
If you don’t have a tension gauge, you can calculate the percentage of a wire’s breaking strain by measuring its stretch, normally over a distance of 2m: when 1×19 wire has stretched by 1mm over a 2,000mm length, it’s at 5% of its breaking load whatever its diameter.
Most cruising boats have rigging made from 1×19 wire. On sportier boats, it might be Dyform or rod, in which case 5% of breaking load is indicated by stretch of 0.95 and 0.7mm respectively. For the purpose of our illustrations, we’ll assume 1×19.
For accurate measurement the rigging needs to be completely slack. Hold the end of the tape a couple of millimetres above the top of the swaging, then measure 2,000mm up the wire, secure the other end of the tape here and start tensioning. When the gap between the top of the swaging and the end of the tape has increased by 1mm, you have reached 5% of the wire’s breaking strain, so 3mm equates to 15% and 5mm to 25%.
Bear in mind that 1×19 wire will be affected by bedding-in stretch during its first few outings, so new rigging will need to be re-tensioned a time or two during the first season.
Sensible precautions 1. Don’t force dry bottlescrews: keep them well lubricated. 2. Don’t use massively long tools for extra leverage on the bottlescrews. If you can feel the load, you’re less likely to strain or break anything. 3. Most boats will flex to some extent when the rig is properly tensioned. If you’re concerned about excessive bend, take it easy, use a straight edge across the deck to check for movement, and seek advice. 4. The percentages of breaking load quoted assume that the rigging is of the correct diameter as specified by the designer, builder or rigger.
How to set up a masthead rig with single in-line spreaders
This is the simplest type of rig to set up. Whether it’s keel-stepped or deck-stepped and supported by forward lowers or a babystay, it’s the same basic procedure.
Step 1: Get the mast upright athwartships

Measure the distance to fixed points on both sides that are symmetrical about the centreline, such as the base of the chainplates.
If you don’t have a long tape measure, use the halyard itself (this is where a spring balance can help you gauge the same tension on each side).
Centre the masthead by adjusting the port and starboard cap shrouds until the measurements are the same, then hand-tighten the bottlescrews by taking the same number of turns on each side.
Re-check and adjust as necessary.
A long tape measure is useful for getting the mast upright.
Step 2: Setting the rake

Rake is determined principally by the length of the forestay. Some roller-reefing systems allow no adjustment but you can increase length by adding toggles.
Adjust the forestay and backstay, checking the rake with a weight suspended from the end of the main halyard. One degree of rake is about 6in (15cm) in 30ft (9m).
Hand-tight on the backstay’s bottlescrew (or gentle use of the tensioner) is fine at this stage.
Rake is measured from the aft face of the mast, at or below boom-level. If the boat’s rocking around, suspend the weight in a bucket of water to dampen the movement.
Step 3: Tighten the cap shrouds and backstay

Take no more than two or three full turns on one side before doing the same on the other.
Count carefully.
You’re aiming to tension the caps to 15% of their breaking strain, measured as explained on page 41.
That might be much tighter than you’ve ever had them before!
Tension the backstay to 15% of its breaking load.
Note: Using ordinary hand-tools on the bottlescrews, it’s hard to over-tension the rigging
Step 4: Tighten the lowers / babystay

A mast should bend forward in the middle, though only to a small extent on masthead rigs of heavy section.
This ‘pre-bend’ is principally to counter two factors in heavy weather: increased forestay loads pulling the top of the mast forward, and the head of a reefed mainsail pulling the middle aft.
Together, they can result in the middle of the mast bowing aft, which makes it unstable and is bad for sail trim. For maximum strength in extremis it should be straight.
Use the forward lowers or babystay to pull the middle of the mast forward. The bend thus induced should be no more than half the mast’s fore-and-aft measurement.
Then take up the slack in the aft lowers.
They don’t need to be tight; they’re just countering the forward pull.
Sight up the luff groove to make sure the mast is straight laterally. Correct any deflections with the lowers.
If you set up the caps properly to start with, you should not adjust them again at this stage.
Step 5: Check the rig under sail

First, make sure the leeward cap shroud isn’t waving around in the breeze. You should be able to deflect it with a finger by a few inches; no more.
If it’s too loose, take a turn or two on the leeward bottlescrew, then tack and do the same on the other side.
Now sight up the back of the mast.
It should be straight athwartships and bending slightly forward in the middle.
Athwartships deflection might make it look as though the top is falling away to one side (see diagram), but it won’t be if it was centred properly in Step 1. Straighten the middle by adjusting the lowers
If it’s straight or bending aft in the middle, try increasing the backstay tension (but not beyond 30% of its breaking strain) and, if necessary, tensioning the forward lowers/babystay and slackening the aft lowers.
Remove any lateral bends by adjusting the lowers.
Once you’re happy, lock off the bottlescrews to make sure they can’t come undone.

Inverted bend (mast bowing aft in the middle) is bad for sail trim and potentially dangerous for the rig.
Setting up a fractional rig with single, aft-swept spreaders
Widely used on smaller cruisers and cruiser/racers, this configuration needs a very different approach from an in-line masthead rig
This stage is the same as with a masthead rig (scroll up).
Step 2: Set the rake

This time, however, rake is set by the forestay and cap shrouds rather than the forestay and backstay.
With a swept-spreader fractional rig it’s the cap shrouds, not the backstay, that stop the mast moving forward. They provide both fore-and-aft and lateral support, so they’re doing two jobs.
The backstay’s principal role is to control the topmast and mast-bend. Because it’s above the point where the forestay joins the mast, it’s not pulling directly against the forestay and therefore has less effect on forestay tension. How much it pulls against the forestay depends on factors including the height of the topmast, the stiffness of the mast section and the tension of the lower shrouds (which determine the bend).
Step 3: Tighten the cap shrouds

Forestay tension is achieved primarily through the caps, and because they’re swept back at such a shallow angle they need to be seriously tight.
Their maximum tension is 25% of breaking load, but it’s best not to tension them all the way in one go because that would result in a very bent mast: tensioning the caps pushes the spreaders, and therefore the middle of the mast, forward.
Start by taking them to about 15% of breaking load, then tighten the lowers to pull the middle of the mast back so it’s straight.
This is how the swept-spreader fractional rig works: the caps and lowers are working against each other, caps pushing and lowers pulling, to stabilise the middle of the mast. Sight up the mast when it’s straight to check for lateral deflection, correcting it with the lowers.
With a flexible mast you might need to repeat the process, taking the caps to 20% before tensioning the lowers again.
Otherwise go straight to the next stage, which is to pull on the backstay.
Since the backstays on fractional rigs often have cascade purchases at the bottom you can’t measure the tension by stretch as you can with wire, so you have to do this by feel: pull it tight, but don’t go mad.
Tensioning the backstay bends the mast and therefore shortens the distance from the hounds (where the caps join) to the deck. This loosens the caps, so it’s easier to tension them back to the 20% mark.
When you let the backstay off, the caps will tension again and should be at about 25% of breaking load – but no more.
Step 4: Set the pre-bend

Take a few turns on the lowers to achieve the right amount of pre-bend. It should be more than with an in-line masthead rig, but a mast should never bend to more than 2% of the height of the foretriangle even with the backstay tensioned (that’s about 180mm in 9m, or 7in in 30ft).
Check to see how far the mast bends with a tight backstay. The optimum bend will often be determined by the cut of the mainsail, or recommended by the sailmaker or class association.
Pre-bend is vital because most fractional rigs don’t have forward lowers or a babystay, so if the mast were to bend aft in the middle (inverted bend) it could collapse.
In fresh conditions, especially under spinnaker , it’s a wise precaution never to release the backstay completely. That stops the upper section of the mast being pulled too far forward.
The caps should be tighter than with a masthead rig, with no significant slack on the leeward side when the boat’s hard on the wind and heeling 15-20°.
If the static tension is up to 25% but the leeward cap is always slack, the boat might be bending. That’s a topic beyond the scope of this article!
Sight up the mast to check the bend both fore-and-aft and athwartships, adjusting the lowers as necessary.
Setting up a fractional rig with two sets of aft-swept spreaders
As mast sections have become slimmer, this is now a popular configuration on boats between 30ft (9m) and 40ft (12m) but it’s more complex to tune.
This stage is the same as with the other types of rig.
Follow the procedure as described for single-spreader fractional rigs. Generally speaking, more rake improves upwind performance but too much will induce excessive weather helm and hamper performance downwind. Getting it right might involve some trial and error.
Steps 3 & 4: Tighten the caps and set the bend

The same fundamentals apply as for a single-spreader rig, but this time after each tensioning of the cap shrouds, which induces bend, you have to straighten the mast by tensioning both the lowers (also known as D1s) and the intermediates (D2s).
The D1s control the bend between the deck and the upper spreaders and the D2s between the lower spreaders and the hounds, so their areas of influence overlap.
On boats where the D2s terminate at the lower spreaders you have to send someone aloft to adjust them. These are referred to as discontinuous intermediates.
If they run over the spreader tips and down to the chainplates (continuous intermediates) you can do everything from on deck.
You need to achieve an even bend fore-and-aft. If the mast is bending too much at the bottom and is too straight at the top, tighten the D1s and slacken the D2s.
S-bends can creep in athwartships and make it look as though the top of the mast is off-centre. If you set up the cap shrouds properly it shouldn’t be, so don’t fiddle with them any further now: take out the bends with the D1s and D2s.
You’re aiming for a cap-shroud tension of 20-25% of breaking strain, as with a single-spreader fractional rig, and again the sweep-back of the spreader means that the caps will be slackened as you pull on the backstay.
As with other types of rig, get the boat heeling around 20° on the wind, tension the backstay and feel the leeward cap to make sure there’s only minimal slack.
Removing any kinks and S-bends can take more tweaking of lowers and intermediates, the latter being more fiddly to adjust if they’re discontinuous.
If the masthead looks as though it’s falling off one way, it’s probably because the D2 on the opposite side is too tight.

Left: Windward lower too loose. Right: Windward intermediate too tight.
Why not subscribe today?
This feature appeared in the May 2012 edition of Practical Boat Owner . For more articles like this, including DIY, money-saving advice, great boat projects, expert tips and ways to improve your boat’s performance, take out a magazine subscription to Britain’s best-selling boating magazine.
Subscribe, or make a gift for someone else, and you’ll always save at least 30% compared to newsstand prices.
See the latest PBO subscription deals on magazinesdirect.com
- Forums New posts Unanswered threads Register Top Posts Email
- What's new New posts New Posts (legacy) Latest activity New media
- Media New media New comments
- Boat Info Downloads Weekly Quiz Topic FAQ 10000boatnames.com
- Classifieds Sell Your Boat Used Gear for Sale
- Parts General Marine Parts Hunter Beneteau Catalina MacGregor Oday
- Help Terms of Use Monday Mail Subscribe Monday Mail Unsubscribe
Standing rigging adjustments and tuning
- Thread starter MccNeo
- Start date Sep 15, 2016
- Macgregor Owner Forums
- Ask A Macgregor Owner

I have noticed several posts that result in various discussions about tension and adjustments of the standing rigging. The information available in the owners manual for the MacGregor 26S that I purchased used was of very little help. MacGregor was not very specific on the subject. If you push your boat hard, race your boat, or sail in winds subject to high velocities or gusts, then getting rig tension correct could prevent loss of the entire rig. Improper tensioning can result in hardware failures, excess stress to chainplates or deck fittings, and poor or sail trim. I have found various sail manufacturers will have rig tuning information on their web sites. These can be very helpful but not necessarily specific to the boat model. Also, since MacGregor didn't provide details, I looked to other boat manufacturers of boats similar in design and performance to the 26S for guidance. One item I believe to be essential to proper turning and adjustments is a Loos Gage. It typically comes with rudimentary instructions for use and basic tuning guidance. They run about $90. Rigging tension will change for a vessel that is adjusted on land and then launched (not be much but will be different). Also, it will change after about two or three weeks from initial tensioning. Rig tension should be checked every 6 to 10 months. I have provided one sail manufacturers suggestion for rig running below. Harry, please forgive me for not asking before posting: Tuning a Rig with Swept Aft Spreaders In my article on Controlling Headstay Sag I focused mainly on conventional rigs with in-line spreaders. On those rigs your adjustments are done mostly with the backstay, runners, and checkstays. Tuning a rig with swept aft spreaders and shrouds is quite different because in these rigs a large component of both headstay sag and mast bend are controlled through shroud tension. These rigs are most often found on boats with jibs that don't overlap the rig. To start you need to understand what the individual shrouds do, and what effect changing their tension will have. Your rig will have an upper shroud, also called the V1 or cap shroud, which runs from chainplate at the deck up to the hounds or point where the headstay attaches to the mast. It will have a lower shroud, called the D1, which goes from the chainplate to the base of the first spreader. If you have multiple spreaders you will also have diagonal shrouds that runs from the tip of the spreader below to the base of the spreader above. With a two spreader rig this would be called a D2, with a three spreader rig you will also have a D3 and so on. These diagonals may pass over the end of the lower spreader and continue to the deck where they are adjustable or you may have "discontinuous" rigging where each of the diagonals terminates at the end of a spreader where it will be adjustable. The V1 shrouds center the top of the mast in the boat but since they also pull aft they tighten the headstay and induce pre-bend in the mast from the compression load. The D1 shrouds support the sidewise load in the middle of the mast and since they are pulling aft on the middle they will also control how much pre-bend you have. If you have have a two or more spreader rig the upper diagonals, D2's, D3's, etc. will control the sidewise bend in each section where they are attached. Tuning one of these rigs takes some time because your ultimate goal is to reach a point where you have the correct amount of pre-bend, at the same time that the mast stays straight sideways, at the same time you have the correct amount of headstay sag. Start by setting the mast with the desired amount mast rake. This is set only by the length of the headstay; make it longer and you have more rake, shorten it and you will have less. The boat designer, if available, will have an amount he designed for the rig when he developed the rig and hull package. If you are sailing in a one-design class there will probably be tuning guides developed by the top sailors in the class that will give you a rake measurement. In the absence of either one of those try starting out with about 1 degree of rake. That is an amount that is often used by designers and should certainly be close enough for a good starting point. 1 degree equates to about 4" of rake for every 20 feet of mast. Next you will need to know how much pre-bend you should have in the rig. The spar makers should be able to give you a measurement for the amount of pre-bend they designed the mast to have, or again if you are sailing in a good one-design class there will be tuning guides with the amount of pre-bend that has been proven to work in the class. With this information at hand start with a basic "dock tune". With all the diagonal shrouds slightly loose start tightening the V1's, measuring as you go to keep the top of the mast centered in the boat. Tighten them to the point that you have about 25% more pre-bend in the mast than your designed spec. Next tighten the D1's enough to pull the pre-bend back to the desired amount while sighting up the mast to see that it is straight side to side. If you have other diagonals go ahead and tighten them just enough to take the slack out, again sighting the mast as you go to keep it straight side to side. The final tune has to be done while sailing. You should do the initial tuning in light to medium air with just the main up and then as you dial that in work up to more wind. Start by sailing hard on the wind and sighting up the mast, it helps to make notes as you go. First look at the leeward V1, if it is very loose you will need to tighten both V1's equally to keep the top of the mast centered. Take up turns on the leeward V1 enough to take about 1/2 of the slack out of it. Now tack over and tighten the other V1 the same amount. Now look at your pre-bend, since you have tightened the V1's the mast will have a little more pre-bend so tighten the D1's enough to pull the bend back to the desired amount. do this by tightening up the leeward D1 a turn or two at a time, tacking over and adjusting the D1 on the other side. You have to keep sighting up the mast on each tack to be sure your are keeping the middle of the mast centered. Once the D1's are set move up to any other diagonals you have, adjusting the leeward side a turn at a time, tacking over and adjusting the other side as you go. If you have discontinuous rigging this has to be done by a crew member that is aloft so he can adjust the turnbuckles that are at the ends of each spreader. Once your are satisfied that the mast has about the right amount of pre-bend and that it is staying straight side to side, you can start on you final tuning that involves fitting the rig to you sails. Your mainsail should have been built to match the amount of pre-bend the rig builder specified but you can change the amount of pre-bend slightly to make it fit better if needed. Do not reduce the amount of pre-bend to less than the specified amount! Next hoist the jib and sail up wind with it, tacking back and forth a few times while checking the mast to see that it is still straight. At the same time look at the headstay sag and how full the jib is. If you have too much headstay sag when you have enough backstay tension on to make the main look good you will need to tighten up the rig. Tighten up the leeward V1 by two or three turns and tighten up the leeward D1 by half that amount. tack over and do the same on the other side while looking the mast to see if the ratio you used between the V1's and D1's was about right to keep the mast straight side to side. You may have to adjust the D1's a little more or a little less and then re-adjust any other upper diagonals you have. This is a slow process and needs to be done in different wind conditions to really get it right. You will find that to really do it right you will need to adjust the shroud tensions differently for different wind conditions. This need to be done by tuning in the different conditions while sailing with the jib you will use in those conditions. Each jib is cut for different amounts of headstay sag so the overall rig tension has to be changed to match that sag. On boats with multiple jibs you shouldn't have to adjust the rig very much because the jibs should have been designed to work in a narrower range and cut to match the headstay sag you get. On boats that sail with only one or two jibs you will need to adjust the rig a lot more to make the jib work over a wider range. Make sure you record the exact settings you start with and how much you change it for different conditions. This is often done by having a "base" setting and then keeping track of how many turns on or off you put on each turnbuckle as conditions change. This works but it is very easy to lose count of exactly what you have done. A much better way is to get a dial caliper that costs around $25.00 and measure the distance between the studs inside the turnbuckle. Record these numbers in your rig notebook for the different settings. That way you always have a number you can come back to no matter what happens, if you get confused about how many turn you went in which direction, or even if you pull the rig out. Getting back to your desired setting is just a matter of tightening each turnbuckle to the desired measurement. This whole process is slow and usually an ongoing process. Each time you race you should record the conditions, the rig settings, and your results. If the results weren't what they should have been make small changes in the rig to match the mast bend and headstay sag to what you needed to do better. Write it down each time and you will develop your own set of settings that work for you boat and your sails. Harry Pattison President Elliott/Pattison Sailmakers
Great information Thanks for sharing
- This site uses cookies to help personalise content, tailor your experience and to keep you logged in if you register. By continuing to use this site, you are consenting to our use of cookies. Accept Learn more…
Cableware® Division / How To’s / How to use Tension Gauges
Military Critical Technical Data Agreement
Helpful Information: Rigger’s Guide to proper swaging techniques

How to use Tension Gauges
How to use tension gauges video transcript.
Ahoy mateys
Hey today lets talk a little bit about the tension of your stays
I’ve got good news and bad news
The good news is Loos and Company helps take some of the guess work out of what the tension ought to be
Now they make three different tension gauges and it’s a function of how big your stays are, the size of your cable
So this is the middle one and there’s one for smaller cables and one for bigger cables
Now there’s certain tolerances that your stay should be within and that helps right here
They’ve got a little thing on here
The bad news is you’re not going to find a chart somewhere that says you have ABC boat and your stays are a quarter inch and you have such and such a sail, so your tension needs to be 900
While the tension on the stays is also a function of sailing performance, the shape of the sail
But you know there are certain tolerances that you should be within and Loos helps take the guesswork out of that
Now you may say to yourself well hey I’m not a professional rigger, what do I need this for?
All the more reason you need one of these
You know these professional riggers they can go around and they can test things out pretty well
Here you want to make sure that you’re somewhere in the tolerance levels of this and then fine-tune it as you get more comfortable and learn more about sailing
Especially racing sailors tension is very very important
Well let’s talk with Eddie the shop foreman here at the Salient Emporium who is a professional rigger to give us some general guidelines as to what we should be looking for and what we should have on our stays
And then he’s going to come on board my boat and we’re going to go through the process of how to use this gage and how to tighten the stays
Alright guys so here we are with Ed, a professional rigger, give us a little more information
Now Ed, as a typical cruising sailor how tight do I want my rigging to be?
You want it, you don’t want it tight tight but you do want it on the tight side because what you want to do is that so when you’re sailing if you’re on a starboard tack then the rigging on the port side is not loose
So you want everything to stay tight so say when the wind comes across starboard side pushing the sail and everything that way then if everything is too loose and all your rigging
you’ll see it on the port side will hang loose and vice versa if you want a port tack then all of the wind of the rigging on the starboard side will be loose
You don’t want to be able to see it moving around in the wind
So you want it to be a little bit tighter than looser?
Okay, now on this gauge here we’ve got now I’ve got quarter inch stays
I’ve already tested that guy’s
So here we’re going to go on anywhere from 450 pounds of tension to 2,000
Where do I wanna be at
I would start that somewhere about in the middle
So maybe somewhere around the 900 to 1100
Somewhere in that area at 11-13 percent
All right now is that for all the stays or just the two main ones that go up to the top
Well the uppers and the forward and the lowers will be tighter than your, the uppers your back stay head stay will be tighter than your lowers will be
Okay so we’re going to go out to the boat and see where I am
Now I did notice guys I took my main halyard and I brought it down
I measured on the starboard side and I brought it over to the port side and I seem to off a little bit there
You know so the mast is not quite straight
So I wanna straighten that out first
You want to get it to the center of the boat as far as side-to-side
You don’t want it more towards the starboard side, the top, or the port
You want to have it dead center of the boat
Okay now what stage are those the first ones we want to do?
We will start with uppers and get the masthead in the center of the boat as far as side-to-side
Okay, and then we’re gonna do the ones that go up to the spreaders?
Do the lowers yeah and that way once you get to the top of the mast in the center then you work down and you get the rest of the mast lined up with it
Okay, and so the tension is really a matter of the size of the cable?
And sail shape and kind of sailing you’re doing?
All right well guys let’s go out and just see how we do this, how we test this, and then how we actually adjust the turnbuckles to get the right tension
All right let’s go
Okay what we want to do is make sure the top of the masthead is in the center of the boat, side to side
So what we’ve done we’ve got a line hook here to the main hired and we’ll stretch it down to the top of the staunch and then go to the other side to see how they compare
You always want to make sure that whatever you use is it’s the same on both sides
That way you get a good accurate measurement
So we’ll pull it down and top of the staunch is right here so we’ll go to the other side of the boat and do the same thing and see how far off we are
All right so Eddie has given me this, let me see what we got here
You can see we are that far off so the mast, that top of the mast is actually heading towards the starboard side of the boat
So what we want to do is either loosen up on the starboard side and crank up on the port side, pull it over to get it straight
Or just crank up on the port of the rigging if it’s loose enough maybe we can pull it over and straight it out that way
And then once get it in the center then you take up evenly on both sides so that everything is tight
The same tightness on both sides and a mast stays on the center of the boat
Okay we’re going to check the tension now on this
We’re going to use the Loos gauge
Check tension on the upper
To use this we’ve added a safety feature here so we are gonna clip this around here so if we drop it, it doesn’t fall overboard
Okay then you just put the stays in between these two knobs here at the bottom
And you pull back on this and let it clip in there
And that’s where you get your reading from
You can see it’s on about 17 and then we look down this gauge here and 17 is up here
We need to be down in this area here somewhere
So that’s telling us we need to tighten up on this cord upper to get it one thing to get the mast over this way but also tighten up on the rig all together
All right yeah I’m pretty far off there Ed
All right now let’s look down at the turnbuckle and how do I actually do that
Okay once you get the locking nut loose
Not all boats have the locking nut sometimes they just have the stud coming down into the turnbuckle
And then there’s just cotter pins going through to hold it in place so if you have that you just pull those cotter pins out and then it’s ready to loosen or tighten
To tighten this we’re going to put the wrench on the flat spot of the fitting here coming down the rigging
And you can stick a screwdriver into the turnbuckle, the body turnbuckle, and turn it
Most time it’s counterclockwise to tighten so we will put a few turns on this and then check our tension gauge and see how much it changed
Okay so I’m tightening up on the turnbuckle and we’ll see how it changes on the gauge as I’m tightening up on this
Well this is pretty good Ed because we’ve got the gauge in place and as you’re tightening I can see it’s moving and we’re getting closer to, let me see what number we wanted
We wanted 32 and we’re at 25 right now so we’re getting there
Okay but now before we tighten up too far on this what we ought to do is check the top of the masthead again and see if we’re getting closer to pulling the mast back over to the side
we don’t want to go too far this way and then watch and loosen up on this side and pull it back on the other side
Okay so we want to take it in small increments?
All right well let’s test this and see here where we are on our straightening
Inside we are now here, we’ll take it over to the outside
Tail a little bit these gotta go to port just a little bit more but we’re getting real close
Actually right now we have gone too far to the port side
So when you tighten up on the starboard side and bring masthead back over this way a little bit
Alright so now we’re going to bring the gauge back over here and work on this one
Okay so you can see we’re right on 25 over here so we still need to get down into this area here around 30-32
So when we tighten that we bring that down, we’re also going to be tightening the other side too?
Yes we’re going to pull on the other side
So masthead back in the center and at the same time we’ll be tightening the rig both the uppers to get where it needs to get
Tightened it up on the starboard side now to bring the masthead back over this way and also tighten everything down to get it where it needs to be on the gauge
All right so now Ed we’re up to about 26-27
All right so now we’re on 30 here now we need to check for our straightness again?
Yes we’ll check straightness again and if we still want to make it tighter at that point if the mast in the middle then we want to take up the same on both sides
Take a turn here take a turn there or two turns here two turns there
It’s that way once it’s in the center we’ll keep it in the center
Okay so we’re kinda just gonna bounce back and forth?
Okay it’s pretty much right at the same height from each side to side so we got the mast pretty much in the center of the boat now
So then what we’ll do, we’ll work down from that
We’ll go down to the lowers and get the middle of the mast lined up with the top and the bottom
Okay we’ve got this set on 30 which is about midway of where I wanted to get it at
We’ll leave it there, we’ll get everything tightened and pinned and locked back in place and then we’ll start with the forward air flows get them tensioned and get the middle of the mast lined up with the top and the bottom
And you take it out sailing and check things out and then we’ll recheck it once you come back in
All right so now on these other ones that we’re going to do here
These things here ‘the half lowers and full lowers’ those need to be the same tension?
No they will not be as tight as the uppers are
they will be somewhere around the 20-26-28 somewhere in that range
Okay so we’re gonna do that next
All right Ed so now I got a pretty good idea of how this thing works and really it’s pretty neat
I don’t want to tie you up so I’ll go ahead and do the forward and half stays and can you come back and check me then?
Sure yeah I can check it, but just don’t forget when you get done, make sure all the turn buckles are locked back down so these nuts will screw down to the top and the bottom will screw up to the bottom
and then once you’re done that as an extra safety thing put in these caudal rings as it will go through the turnbuckle and in the holes and the studs there and that would keep those turnovers from backing out on their own
All right well I’m gonna give it a shot Ed
Man I tell you what, I’m just really shocked at how loose these stays were and how crooked my mast was
I’ma feel a lot better about heading out tomorrow
You’re sailing should be a lot better
Well thank you
All right Ed what do you think?
Well first thing I’m going to check is I want to make sure you got the mast in a straight column going all the way up and what I’m going to use is I’m gonna look at the sail track and if it’s off one way or the other here in the middle it’ll look like a snake or look like a banana
It would be bent so I’m just gonna look up the mast and see if it looks straight
Actually Dominic you’ve done a pretty good job as the mast track is straight all the way to the very top
Wow! All right
So the next thing we want to do probably is to check the tension on all the rigging to make sure everything’s at the proper tension
Okay and you’ve got that on actually pretty well, it’s up on 29
So you’re right in the area of where I wanted you to be
As long as this one’s the same and then what you want to do is just take this off of here and go over to the port side and make sure that everything is set to the proper tension on both sides
Which I would say they’re going to be because if not the mast when we pull it over to that side of the boat would not have been straight
And that you’ve got it exactly on 29 so that looks good
All right so I’m ready to be a professional rigger?
No, but you will be able to go out and adjust your sails and get it fine-tuned for you to sail the boat you know to what it’s supposed to be sailed at
I’ll get this cable out of the way here Eddie
Well Ed I really appreciate the help on this I think it’ll be helpful for a lot of cruisers
I’m headed out tomorrow so I’m gonna give it a test
Okay well good you definitely will see an improvement in the sailing I’m sure of that
Guys did you see how easy that was?
It didn’t take long at all and I’ll tell you what, I feel much better about going out sailing tomorrow, knowing that I’ve got even tension
I mean this thing was so far off it was unbelievable
This (Loos Tension gauge) I think is going to very very handy to have on board on a regular basis
Anyway guys happy and safe boating to you, your family, and friends
The Loos Tension Gauges take the guesswork out of cable or rod tension adjustment. The tension gauges are especially designed for accurate, repeatable tuning of a sailboat’s standing rigging.

Model #PT-CR
(Cable Railing)
Sizes 1/8, 3/16, and 1/4

Model 90 & 91
Sizes 3/32 to 9/32 and 2.5mm to 7mm

Model RT Series
(Sail Rigging (Rod))
Sizes .172 to .375 and 4.4mm to 9.5mm
The Loos tension gauges take the guesswork out of cable or rod tension adjustment. The tension gauges are especially designed for accurate, repeatable tuning of a sailboat’s standing rigging.
Contrary to popular thought, a slack rig is more punishing on a hull than a properly adjusted, tight rig. Insufficient tension will not reduce the loads transmitted in the hull. Slack rigging will punish the spar and rigging needlessly by allowing excessive movement, chafe and shock loading. Modern fiberglass hulls should not be damaged by a properly adjusted, tight rig.
Figure 1 lists the rigging tension under different conditions for a typical boat with a properly tuned rig and with a slack rig. It will be noted that the maximum load is the same. However, for properly tuned rig the leeward / shrouds will not go slack under normal sailing conditions.
The lateral stiffness of the mast and the fore and aft stiffness of the spreaders is reduced by a factor of 2 when the leeward shrouds go slack. This Important structural characteristic is not generally recognized.
Rigging tension is becoming more important as a result of the trend toward the use of mast bend to control mainsail shape under different wind conditions. Mast bend will also affect the shape and trim of the jib, since mast adjustment generally affects forestay tension. The expert skipper will benefit by maintaining consistent rigging tension while developing the optimum sail shape and sailing tactics.

Safety and Performance
The failure of a fitting, shroud or stay could damage your boat, buckle the mast or even cause personal injury. To avoid such failure of (cable or rod) and fittings from fatigue or shock loading, it is important to set up your standing rigging with the proper tension. Too little tension in the shroud will permit the leeward shroud to go slack, only to fetch up with a jolt when the boat rolls or pitches. A less common problem is excessive tension. This can cause permanent stretch to the (cables or rods) and possibly damage the mast.
PERFORMANCE
The actual set of sail under load is determined by the cut of the sail and the shape of the structure which supports the sail. Rigging tension plays an important part in determining the set of the sails.
When the boat has been tuned for peak performance, measure (cable or rod) tension should be recorded. The stainless steel used to make the rigging can stretch a little bit over time under high loading. Thus, marking turnbuckles, etc. cannot guarantee that subsequent adjustments will provide the desired tension. Only by gauging is it possible to repeat the initial tuning or improve it.
Limiting the sag of the forestay is perhaps the most important benefit to performance from having the proper rigging tension. Forestay sag permits the jib luff to fall off to leeward, tightening to leech and seriously degrading the performance to windward.
Tension in the upper and lower shrouds will influence the mast bend and set the mainsail. This is especially important on modern, fractional rigs where the mast bend is used to de-power the sail in heavy winds.
If the shrouds are not set up with enough tension, the leeward shrouds will go slack when the boat is sailing to windward. This can result in fore and aft pumping of the mast in a head sea. This mast movement will change the shape of the mainsail and can cause performance loss as well as possible structural damage.
Specific tension requirements for your application must be obtained from the boat, mast, or sail manufacturer or the manufacturer of the product on which the (cable or rod) is used.
Yachting Monthly
- Digital edition

Sailboat rigging: What is the best way to tune it?
- Ben Sutcliffe-Davies
- March 8, 2022
Is it best to tune your sailboat rigging on the hard or back on the water? Marine surveyor Ben Sutcliffe-Davies answers readers' questions

Where is the best place to tune your sailboat rigging? Credit: Colin Work
Is it best to tune your sailboat rigging on the hard or back on the water?
My Contessa 26 has been lifted out for the winter, but I will need to tune my rigging ahead of the sailing season.
Is it best to do this while the boat is still on the hard or wait until it is back in the water?
Is there an easy way to tune my rigging?
Louisa Moore
Ben Sutcliffe-Davies responds:
This is a really interesting question.
In my view, anything like rigging or shaft alignment should always be done with the craft afloat.
With regards to tuning, it depends on what the owner is intending on doing during the season.
A proper rig check should consider the age of the wire, chainplate, back stay and fore stay security.
Continues below…

Boat rigging: a guide to going composite
‘Like the shift from wooden spars to alloy spars after the Second World War, we are moving to carbon spars…

How to check your rigging – video guide
A screwdriver, a straight edge and a good set of eyes are all that’s required for a basic rig check.…

Expert advice: sails and rigging
Sails and rigging are the engine room of any sailing boat from small dinghies up to giant superyachts. No matter…

Rope, rigging & deck gear: how to choose the right rope
Rope continues to develop every year. We take a look at the plethora of options on the market
Make sure you check the mast step for compression issues.
There are several really good and quite reasonably priced books on setting up the rigging; for the more serious you will need to buy a proper rigger’s gauge.
These can range in price from a couple of hundred pounds to £800-£900.
Often it is better to pay a rigger for a check and set up so you have some peace of mind.
Submit your questions to our experts by emailing [email protected]

Bluewater Edition ultra-premium gin is made by sailors in the Sussex Downs, who blend the finest botanicals with a neutral grape spirit
www.chilgrovespirits.com (RRP £39.95)
Enjoyed reading Sailboat rigging: What is the best way to tune it?
A subscription to Yachting Monthly magazine costs around 40% less than the cover price .
Print and digital editions are available through Magazines Direct – where you can also find the latest deals .
YM is packed with information to help you get the most from your time on the water.
- Take your seamanship to the next level with tips, advice and skills from our experts
- Impartial in-depth reviews of the latest yachts and equipment
- Cruising guides to help you reach those dream destinations
Follow us on Facebook , Twitter and Instagram.

- AMERICA'S CUP
- CLASSIFIEDS
- NEWSLETTERS
- SUBMIT NEWS

Inside the America's Cup: A closer look at AC75 masts and rigging

Related Articles

Inside the America’s Cup: A Closer Look at AC75 Masts & Rigging

Photo: America’s Cup
As the Round Robins progress and Barcelona delivers, the AC75 fleet is looking fast. Whether it’s the return of the cyclors, enhanced foil designs, aero improvements, or more advanced control systems, a range of technical innovations are frequently cited as the reason for driving this impressive performance. In this respect, one area that may have received less attention is the rig and rigging design. Yet, especially since the arrival of composite materials in the America’s Cup, it’s an area that has had a formative impact on how things play out on the water.
Southern Spars has played a leading role since entering the America’s Cup fold in 1995, with the supply of Team New Zealand’s innovative high-performance carbon mast that took them to a historic victory. Southern Spars’ sister company, Future Fibres, is also increasingly central to the trajectory of composite innovation in the Cup.
Class Rules
AC75 class rules specify several key one design aspects of mast design and construction. They stipulate the shape (D-section) and the size (within a tolerance) of the mast tube. The Rule also dictates the required carbon fibre specification, including the fibre modulus, areal weight, and resin content. Additionally, the geometry and materials of the fittings, such as shrouds and spreaders, mast rotation restriction to 45°, and the height of the mast rotation ball relative to the waterline are all defined by the rule.
Mast Rotation
Through controlling the 45° mast rotation, each team has at their disposal a mechanism to access enhanced power and performance. All AC37 participants have selected North Sails as their best option such is the compelling performance of the North Sails Helix structured luff technology, which has redefined what a sail can deliver—its internal structure enhancing power potential by controlling the loads through the sail structure, delivering a proactive, positive sail shape.
With a mast designed to react to the conditions by rotating to the exact degree needed to exploit every breath of wind and realise the sail shape intended by the team’s sail designers, the benefits of Helix are taken to the extreme. You could almost say that the masts on AC75s have become part of the sail, or the other way around, and it definitely feels like the lines are blurring between the essential elements of the engine above deck.
Thickness & Stiffness
Another way masts influence sail shape is, of course, mast bend. This is the stand-out area where teams can differentiate their masts to influence performance. While the D-spar minimum laminate and core details are specified under AC37 class rules, teams are free to add more laminate if they choose to. There are always weight to performance trade-offs, but there is scope within the teams to increase the overall stiffness of the mast, or to alter the deflection response—optimising it to suit the desired degree of mast bend that the team’s sail designers are calling for.

No Backstay
While the rigging for AC37 is a fully one design “supplied” component from by Future Fibres, identical onboard each AC75, some significant changes have been made to the rigging packages since the 36th America’s Cup. One talking point is the elimination of the backstay, which also has a knock-on effect on the wider engine above deck. Mast bend, which would conventionally be influenced by backstay control, is now almost solely manged by sail controls. Another knock-on effect is escalating load through the shrouds, which has required the cap shrouds to be enlarged and jib locks to be upgraded from 5t to 8t for this edition of the cup. One constant though, and as per the AC36 rule, the Future Fibres rigging packages are equipped with integrated fibre optic load monitoring, for performance analysis and to keep an eye on loading limits.
Looking Ahead
Beyond the talking points we have summarised here – luff tracks, batten stiffness, batten locations, halyard locks and mainsail controls – all sit within the remit of team designers. It remains to be seen which technical factors will rise to the surface during the 37th America’s Cup, but it is a safe bet that ripple effects from technological choices and innovations will be felt around the wider sailing landscape in the coming years.
General Manager of Southern Spars, Mark Hauser comments, “We are immensely proud of our close partnerships with the teams and together we commit ourselves entirely to the pursuit of excellence. Innovation in the Cup reverberates around the industry for years thereafter and we are proud to be leading the charge with the world’s most elite sailing teams.”
Related Posts
America’s Cup Event Limited (ACE) and the Challenger of Record (COR) have engaged Future Fibres to supply its new AEROrazr rigging to all teams competing in the 36th America’s Cup Presented by Prada. The America’s Cup is the oldest trophy…
Southern Spars have been building some of the best masts in the world for more than a quarter of a century, and for their first few challenges outside the realms of masts and rigging they haven’t lowered their sights even…

In the past few months Southern Spars has been lucky enough to take part in a unique retrofit project, Project Sophie, which will come to fruition this spring. The 91ft Sophie is a classic yacht, designed by Bruce King for…

(22 August 2018) – Southern Spars, the worlds leading bespoke carbon fibre spar maker, has announced it will be supplying the rig to the INEOS TEAM UK for the upcoming America’s Cup. The America’s Cup – fondly known as the…
Southern Spars brings together Emirates Team New Zealand and Cycling New Zealand to prompt innovation and collaboration Innovation and collaboration were themes discussed as Kiwi business, Southern Spars, brought two world class New Zealand teams together today – Emirates Team…

With dismissing Artemis Racing, Emirates Team New Zealand has secured their fourth Louis Vuitton Cup win and the right to race defender Oracle next week. Much of the talk about Emirates Team New Zealand during the LVC series has been…
As progress continues on their AC50, senior sailing team members from Emirates Team New Zealand visited Southern Spars’ facility last week to check on the yacht which they hope will help them bring home the America’s Cup. Southern Spars have…

The countdown to the 35th America’s Cup is nearly over. It has been such an amazing experience for everyone at Southern Spars to have been so involved with Emirates Team New Zealand. We wish them all the very best of…
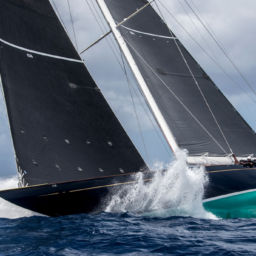
In the 1930s, when the rule was first introduced, J-Class yachts were the pinnacle of world yacht racing. But by 1940 many had been stripped or broken up for scrap metal for the war effort or just abandoned and left…
Southern Spars, builders of Emirates Team New Zealand’s winning America’s Cup Class catamaran, congratulates the syndicate on their outstanding performance in 35th America’s Cup. The Auckland based company, who has had a strong bond with the team since building their…

Built by Southern Spars, Emirates Team New Zealand’s newest America’s Cup yacht has been launched. The Avondale-based mast builder demonstrated its standing as one of the world’s top carbon fibre manufacturers. Southern delivered Emirates Team NZ’s most technically advanced yacht…

This year Southern Spars has been riding the leading edge of technology at the grand prix level of yacht racing and applying the lessons learned to increasingly sophisticated production techniques for both racing and custom cruising yachts. These exciting developments…
Leave a comment Cancel reply
COMMENTS
The rig should be tuned with the boat in the water on a day with little to no wind. You'll also want to be away from wakes and other boats that can rock your boat. To start, the turnbuckles for the stays and shrouds should be hand-tight only. This is sufficient to hold up the rig but places no strain on anything — yet.
1. Check by sighting up the backside of the mast to see how straight your spar is side to side. You can take a masthead halyard from side to side to ensure that the masthead is on center. Do this by placing a wrap of tape 3′ up from the upper chainplate pin hole on each upper shroud. Cleat the halyard and pull it to the tape mark on one side ...
The goals in rig tuning are the following: (1) Eliminate side bend and lean, (2) Set mast rake for proper helm balance, (3) Set pre-bend to match the mainsail design, and (4) Control mast bend and headstay sag. Here are a few definitions and explanations to get us started. GET IN TOUCH. NEW SAIL QUOTE.
Remove the spreaders from the spar, and inspect the area where spreader bases make contact with the mast. Look for compression damage to the mast wall and signs of corrosion damage. If all is well, reassemble using one of the tried-and-proven water-resistant lubricants.
Step 4: Check Your Rig Tension. Proper rig tension is crucial for maintaining sail shape and boat performance. To check your rig tension, follow these steps: Attach a tension gauge to your shrouds and stays. Measure the tension in each wire, adjusting as necessary to achieve the desired tension.
In light winds, a looser rig allows for a fuller sail shape, while in heavy winds, a tighter rig flattens the sails and depowers the boat. Adjusting the rig to suit the conditions helps maintain control and optimize performance. Boat Balance and Helm Feel: Rig tuning affects the boat's balance and how it responds to the helm. Properly tuned ...
Oakcliff's Rigger and Match 40 Fleet Manager, Chris Kennedy, gives a comprehensive lecture on how to tune your sailboat rig. He starts with an overview of th...
Tuning the rig of a boat is one of the necessary -and pleasant -tasks which must be done to achieve good performance. In an untuned boat, the mast bends in odd ways, and this in turn causes the sails to set badly. By contrast, on a well tuned boat, the rig bends in a controlled fashion, allowing the sails to do their best.For this reason, an avid racer will be constantly fiddling with the tune ...
Rig tuning: conclusion. A well-tuned rig makes a boat sail better, while ensuring your mast is correctly supported is a safety essential. As mentioned at the beginning of this article, boats move, so although you should be able to leave your mast rake and side-to-side centring alone, keep an eye on the shroud tensions.
For many sailors, the relationship between rig tune and performance often seems like a black hole. Quantum's Dave Flynn takes us on a tour of the core elements of the rig and what you need to know to demystify tuning for optimum performance. Mastering rig tuning for optimal sail trim and performance might seem daunting, but fortunately it's ...
pointing ability. Note: The 7.9 sails Faster and Higher when the. heeled.CunninghamThe Cunningham provides you with two functions, the first is to control the position of the draft in the sail and the second is. o tension the luff. Always set your main halyard tension for down wind, use the Cunningha.
PLEASE NOTE: THIS VIDEO HAS BEEN UPDATED WITH ENHANCED GRAPHICS AND IMPROVED SOUND. CHECK IT OUT HERE https://youtu.be/tRgWtPaCQQcA beginners guide to sailbo...
How to do the Dynamic Sail Rig Tuning. For the dynamic tune, sail close-hauled in a moderate breeze (12-18 kts). The leeward shrouds should be loose but not slack. Snug them up by hand (count your turns), then tack and do the same on the other side. The mast should remain in column throughout - new bends are best resolved back at the dock.
The lazy rigger screws the turnbuckle on deck a few turns so that he has only to hook the vertical shroud, the V1. Standing rigging - measuring the tensiones. So, in order to avoid any dangers, we set the inner forestay (to double up with the forestay). We also set runners and checkstays just for safety.
Learn how to Tune the Rigging of a Sailing Catamaran / Multihull. This is an introduction on how to tune the rig, common terms, and much much more.We hope yo...
What you will need to tune your rig. Essential; A calm day: don't try setting up your rig in more than a few knots of wind. A boat that's floating level fore-and-aft (and preferably laterally ... Step 5: Check the rig under sail. The caps should be tighter than with a masthead rig, with no significant slack on the leeward side when the boat ...
Tuning your rig - left adding turns, right measuring the tension using a vernier guage. To check the adjustment of your rig start by sailing close-hauled with the boat nicely powered up at around 20 degrees of heel - ideally with full sail in flat water and around 10-14 knots of wind, depending on the vessel. Start by observing the cap ...
One item I believe to be essential to proper turning and adjustments is a Loos Gage. It typically comes with rudimentary instructions for use and basic tuning guidance. They run about $90. Rigging tension will change for a vessel that is adjusted on land and then launched (not be much but will be different).
Oakcliff Training Program Director, Ethan Johnson, kicks off the Oakcliff Cocktail Breeze video series by walking us through the process of tuning the rig on...
Sizes .172 to .375 and 4.4mm to 9.5mm. The Loos tension gauges take the guesswork out of cable or rod tension adjustment. The tension gauges are especially designed for accurate, repeatable tuning of a sailboat's standing rigging. Contrary to popular thought, a slack rig is more punishing on a hull than a properly adjusted, tight rig.
There are several really good and quite reasonably priced books on setting up the rigging; for the more serious you will need to buy a proper rigger's gauge. These can range in price from a couple of hundred pounds to £800-£900. Often it is better to pay a rigger for a check and set up so you have some peace of mind.
While the rigging for AC37 is a fully one design "supplied" component from by Future Fibres, identical onboard each AC75, some significant changes have been made to the rigging packages since the 36th America's Cup. One talking point is the elimination of the backstay, which also has a knock-on effect on the wider engine above deck.
Point higher on both Port and Starboard tacks and prevent damage to your standing rigging by checking and tuning your rig. This video cover easy ways to chec...
While the rigging for AC37 is a fully one design "supplied" component from by Future Fibres, identical onboard each AC75, some significant changes have been made to the rigging packages since the 36th America's Cup. One talking point is the elimination of the backstay, which also has a knock-on effect on the wider engine above deck.
How to rig and tune a sail.A detailed guide and easy instruction.www.getwindsurfing.comThanks for watching our coaching video we hope that it has helped you ...